Introduction
A friendly guide for using Linux on ASUS laptops
Welcome to the Linux on ASUS documentation! This book is written by the ASUS-Linux team.
What is asusctl?
asusctl is a system control utility designed primarily for ASUS laptops. It consists of three core components:
asusd- the system daemon that talks to your hardware, controlled through D-Bus.asusctl- the command-line client forasusd.- ROG Control Center - a graphical user interface for
asusd.
It provides safe access to platform profiles, custom fan curves, battery charge thresholds, keyboard lighting (Aura), AniMe Matrix and Slash displays, GPU MUX switching, and more, on hardware where the Linux kernel supports it.
Kernel requirement
Warning
Many features are developed alongside Linux kernel updates. The minimum supported kernel version is Linux 6.19 or newer and we always recommend using the latest kernel available. Support for Thermal Design Power (TDP) and other features is tied to the
asus-armourydriver, which is only available mainline since 6.19.
Where to start
- New to Linux on an ASUS laptop? Start with Prerequisites and BIOS Preparation, things to do in Windows and the UEFI before installing.
- Picking a distribution? See Supported Distributions and the Distribution Guides.
- Just installed? Read the General Recommendations, then explore the Usage section.
- Something not working? Check the FAQ.
Prerequisites and BIOS Preparation
Note
This guide does not cover the choices of running Windows and Linux, or only Linux on your device, and their respective partitioning requirements.
So you have decided to try out Linux on your ASUS laptop… That’s great! However there are a few things to do before you can enjoy your Linux installation.
Content
- Backup Proprietary eSupport Drivers Folder
- Creating a win-to-go installation
- Disable VMD
- Disable fastboot
- Disable Secure Boot
- Use the Laptop Screen
- Disable nouveau
- Switch to Hybrid mode on Windows
Backup Proprietary eSupport Drivers Folder
Stock installations of Windows on ASUS laptops include proprietary drivers that cannot be sourced directly from the ASUS website or the MyASUS utility. Before removing the Windows partition or recovery partition these drivers should be backed up. If you ever decide to dual boot or run Windows in a VM, you will need a copy of the drivers for your specific model.
When present, the folder can be found in C:\eSupport. Make sure to back up this folder, before performing any destructive operations on your Windows partition !
Creating a win-to-go installation
Certain laptops have firmware for internal devices that must be updated using Windows: it is very important you keep Windows in a bootable state on a (preferably fast SSD or NVMe) external disk!
Use your Windows installation to run Rufus and create a Win-to-Go installation of Windows.
Once done start that Windows installation and ensure it says it has a valid license (license should be applied from the ACPI just by booting up the installation) and install the official ASUS Armoury Crate as well as any other driver that is available via the ASUS website for your model.
Warning
You are supposed to use this Windows installation to fully update your laptop before installing Linux and regularly after! [!WARNING] The Windows installation might be required if you ask for help to troubleshoot certain issues, so be sure to keep it safe and update it as well as Armoury Crate from time to time!
Disable VMD
Intel laptops have a feature called VMD that is not supported by Linux and should be disabled (on the UEFI setup screen) to avoid problems.
Important
Disabling this will cause issues with booting windows. The easiest fix is to uninstall the raid drivers inWindows, turn off raid/vmd and thne boot windows in safe mode.
AMD laptops can have a RAID mode that should also be disabled: use a software RAID instead if you need such feature.
Disable fastboot
The fastboot feature is known to cause random issues for Linux, especially with Wi-Fi cards. It is strongly recommended to disable it in the UEFI setup screen.
Disable Secure Boot
In Linux, whether or not you need to disable Secure Boot depends heavily on the distro. Installing Arch and its derivatives requires temporarily disabling it, while distros like Fedora typically don’t require disabling Secure Boot at any point. That said, it’s possible to enable it after installation using tools that simplify the process, such as sbctl. For this reason, leaving Secure Boot disabled post-install is not recommended unless you’re running into issues with NVIDIA drivers or custom kernels. This is actually one of the reasons why Arch and Arch-based distros are worth considering - sbctl makes signing the kernel and bootloader straightforward.
Important
IMPORTANT FOR DUAL BOOT USERS!!! DISABLE WINDOWS BITLOCKER BEFORE DOING THIS! OR YOUR DATA WILL BE GONE FOREVER!
To verify NVIDIA drivers and the necessary support modules work without issues, Secure Boot can be disabled in the UEFI.
Guide to disable Secure Boot on BIOS.
- Press DEL repeatedly during boot to enter UEFI setup screen
- Press F7 for advanced mode
- Security → Secure Boot Control → Disable
- Save and exit
This move won’t brick your laptop, the only risk here is your data in Windows if you didn’t disable Bitlocker before doing this.
Use the Laptop Screen
Due to display signal routing on ASUS ROG laptops, and the setup process dealing with multiple graphics devices, having external screens connected during setup may result in unpredictable behavior. Please install your OS with all external displays disconnected.
Disable nouveau
You might encounter the issue about nouveau crashing the installation: this can be solved by adding the boot parameters rd.driver.blacklist=nouveau,nova_core modprobe.blacklist=nouveau,nova_core to the kernel cmdline before booting the installation media. To edit the installation media boot entry just press e on it and then put the blacklist parameters at the end of all parameters. Example:

The same parameter can be used to boot the installed system, but it is not needed after installing official NVIDIA drivers.
Switch to Hybrid mode on Windows
If you have a 2022 or newer model, please put it into Hybrid mode in advance on Windows. Otherwise, it may cause some unexpected bugs/issues.
Installing Linux
You are now ready to install Linux! Head over to the Supported Distributions and choose a distribution !
Supported Distributions
Which distributions officially support asusctl, and what to expect elsewhere
Here are the distributions with a written guide:
- Arch Linux
- Bazzite
- Fedora Workstation
- Fedora Atomic
- NixOS
- openSUSE Tumbleweed
- PikaOS
- Ubuntu 26.04
- Ultramarine
Other distributions that package asusctl:
- AerynOS
- Solus
Distributions that are very popular but are not supported:
- Debian and Debian based (such as Pop!_OS, Linux Mint)
- CentOS/RockyOS or any similar
But why?
Old kernel: many patches that drastically improve Linux experience on an ASUS/ROG laptop are only available in the latest kernel. The minimum kernel version required is >= 6.19 (newer is better), which is why CentOS/RockyOS/Debian are listed as unsupported. Their default kernels often fall below this, especially on newer devices.
However, if you REALLY REALLY need that very specific distro to get your job done, we strongly recommend using DistroBox to provide the environment that the software needs. You can find many youtube videos show you how to use it (Don’t install asusctl on distrobox, asusd needs root access).
On non-supported distros, asusctl must be built from source. Instructions can be found on the asusctl repository.
Before starting your adventure, make sure your distro is:
- systemd based (manual configuration will be required on other init systems)
- utilizes the Linux Kernel, not BSD or so
- updated, utilizing Kernel version >= 6.19
- installed with GPU drivers
- remove any distro provided methods of graphics switching (like supergfxd, envycontrol)
- reboot
General Recommendations
General recommendations for the best experience on ASUS ROG laptops
These recommendations apply to any distribution as long as you use the power profile daemon (ppd) or manually configure the settings (Asusctl was developed with PPD in mind).
Recommended desktop environment
This rule applies to almost the entire project, but rogcc runs on Wayland;
Caution
X11 is not supported. That is why KDE Plasma and GNOME are recommended for the best and most complete experience.
Note
Some integrated GPUs, such as AMD (Radeon 680M in my case), can cause the desktop to freeze. In this case, we recommend KDE Plasma, as it usually restarts the compositor successfully, so you won’t need to force-restart your laptop.
Audio powersaving
You can enable audio powersaving features. Create or edit /etc/modprobe.d/audio.conf as root (e.g. sudo nano /etc/modprobe.d/audio.conf) and add:
# enable audio power savings
options snd_hda_intel power_save=1
For the setting to take effect, reboot the system.
Wi-Fi powersaving
If your wireless card is managed by iwlwifi, you can enable Wi-Fi power saving. Create or edit /etc/modprobe.d/iwlwifi.conf and add:
options iwlwifi power_save=1
For the setting to take effect, reboot the system.
Distribution Guides
Pick your distribution below for the installation steps
Guides
- Arch Linux
- Fedora Workstation
- Fedora Atomic
- Bazzite
- Ultramarine
- openSUSE Tumbleweed
- NixOS
- Ubuntu
- PikaOS
Arch Linux
A simple guide for getting Arch running on ASUS laptops
Since it can be complicated to install arch, in case you don’t want even try archinstall, we also suggest trying:
- EndeavourOS as it feels more like a cohesive distro rather than a collection of software to install and configure.
- CachyOS since it has a very easy step-by-step guide, and it has an amazing out-of-the-box experience.
- Garuda is also pretty popular and has gained a fair share of users.
Every linux kernel past and including 6.19 has everything needed to provide a smooth experience, but it is advised to install a kernel from OGC.
If you own a ROG Ally or ROG Ally X ChimeraOS might be a good choice.
Content
Introduction
Read the Intro guide first to avoid bad surprises, especially if you plan to remove windows entirely.
Installation
To install Arch just follow the regular installation guide for the official archlinux or the procedure provided by your distro of choice.
The suggested bootloader is systemd-boot. Avoid using GRUB.
Also remember to install these:
# AMD systems
pacman -S linux-firmware amd-ucode
# Intel systems
pacman -S linux-firmware intel-ucode
choose either amd-ucode or intel-ucode depending on your CPU.
Note
If you are using the official archlinux read the article about vulkan and install whatever your iGPU might need.
Repository
OGC repo contains all the tools you need on a ROG laptop precompiled for you.
Before adding the repo you need to add the repo sign key to your pacman-key. Run the following commands to add it:
# Ayush key
sudo pacman-key --recv-keys F79100EF8C802DAB81C323BB8EEA5962FE510E19
sudo pacman-key --finger F79100EF8C802DAB81C323BB8EEA5962FE510E19
sudo pacman-key --lsign-key F79100EF8C802DAB81C323BB8EEA5962FE510E19
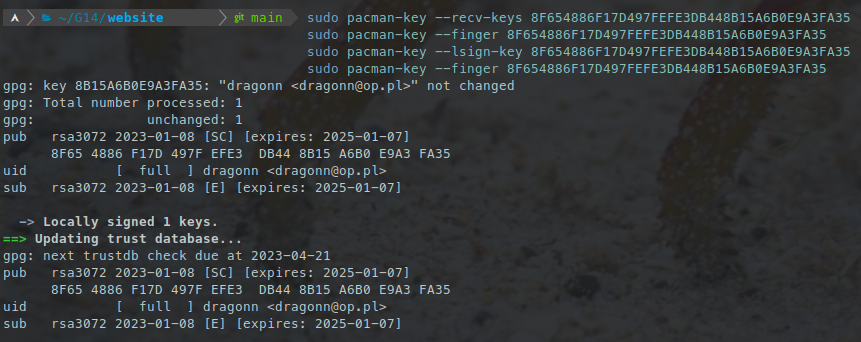
This should show output similar to this:
Tip
Have any problems ? Check if
/etc/pacman.d/gnupg/gpg.confdoesn’t have specified the keyserver or make sure it ishkp://keyserver.ubuntu.comIf you still have problems check if you are not running some active VPN connection, this does sometimes cause problems when fetching the server.
If you still have problems you can do it the less proper way by running those commands
wget "https://keyserver.ubuntu.com/pks/lookup?op=get&search=0xf79100ef8c802dab81c323bb8eea5962fe510e19" -O ogc.sec
gpg --show-keys ogc.sec
sudo pacman-key -a ogc.sec
Verify that the fingerprint shown by gpg --show-keys matches the one published on a trusted source before importing, HTTPS alone does not guarantee the key’s identity.
After that to get the repo add to your /etc/pacman.conf at the end:
[ogc]
Server = https://pacman.opengamingcollective.org
Once done you can then install from there asusctl, rog-control-center and the kernel. After adding the repo run a full system update before you go to install tools from the repo:
sudo pacman -Syu
Asusctl
Important
The recommended way to install asusctl is using the OGC pacman repo. Packages like asusctl-git from AUR aren’t supported. Also installing manually from cloned git isn’t supported
For installing asusctl run:
sudo pacman -S asusctl
asusd service is triggered by a udev rule after the keyboard driver is ready, the service doesn’t need to be enabled and is not supposed to be.
Important
Power profiles:
asusdmanages platform profiles and CPU EPP settings itself via the ACPIplatform_profileinterface. Running an external power profiles daemon (such aspower-profiles-daemonortuned) alongsideasusdcan cause race conditions over/sys/firmware/acpi/platform_profileand CPU EPP preferences. You have two options:
Let
asusdmanage profiles and disable the external daemon:sudo systemctl disable --now power-profiles-daemon.service sudo systemctl mask power-profiles-daemon.serviceKeep the external daemon and disable
asusd’s profile management by setting the following tofalsein/etc/asusd/asusd.ron:change_platform_profile_on_ac: false, change_platform_profile_on_battery: false, platform_profile_linked_epp: false,If you’re using an Arch-based distro you may already have power-profiles-daemon installed, as in CachyOS.
A common way to switch profiles is binding the
Fn+F5key toasusctl profile nextAvailable profiles vary by system, seeasusctl profile list.
Caution
Be aware that some functions or asusctl need kernel-level drivers support, take a look at the “Custom kernel section”
ROG Control Center
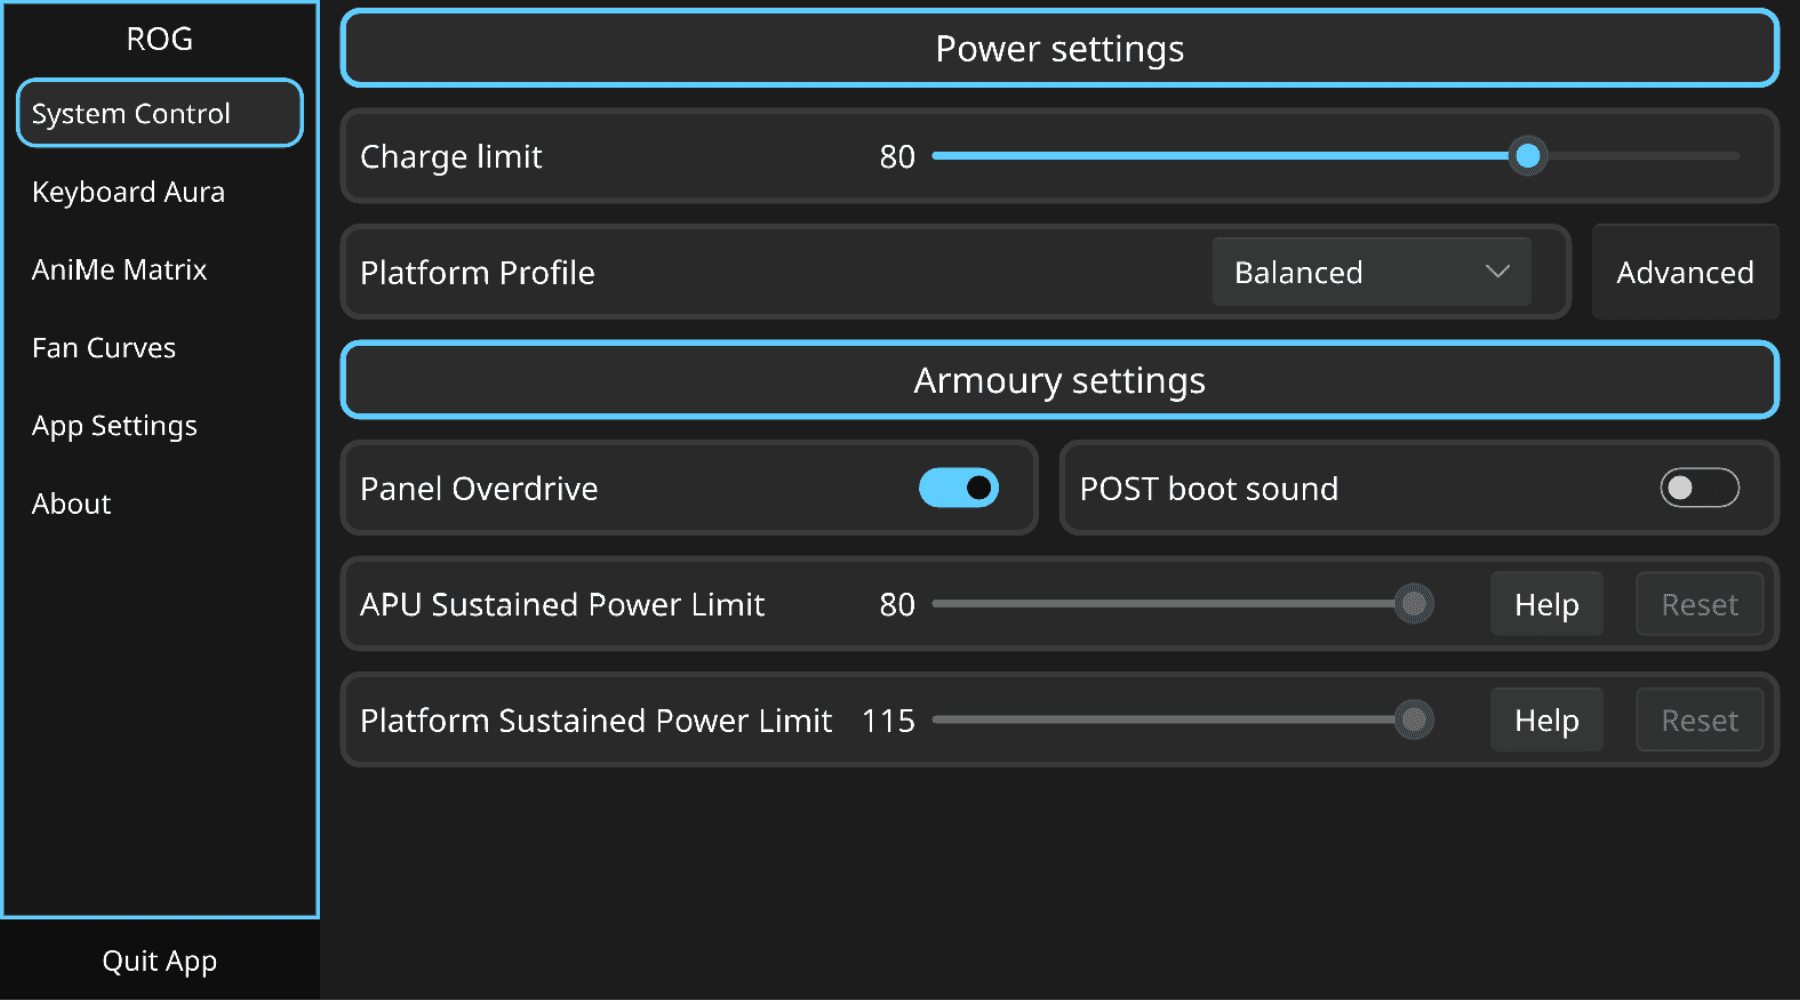
ROG Control Center is a GUI tool for configuring few aspects of asusctl.
sudo pacman -S rog-control-center
Graphics Switching
See GPU Switching for how to manage the dGPU and MUX.
Custom kernel - drivers fixes, hardware support
After Linux 6.19, you shouldn’t need a custom kernel. However, if you’re using an older version or if your device has a feature that hasn’t been included in the main kernel release yet, you can use the CachyOS kernel or the OGC kernel.
OGC kernel
The OGC kernel is the suggested kernel for end-users on arch and is shipped in the organization pacman repo. It can be installed with this command:
sudo pacman -Syu linux-ogc linux-ogc-headers
Caution
If you are using a custom kernel use a DKMS package for nvidia drivers:
nvidia-open-dkmsfor Turing and newer GPUs ornvidia-580xx-dkms(AUR) for Maxwell, Pascal, and Volta. The regular nvidia package works only with stock Arch kernel
After installing the new kernel you need to regenerate your boot menu or add a new boot entry depending on what boot manager you are using.
Systemd-boot
sudo mkinitcpio -P
Verify the new kernel entry appears in the boot menu before rebooting:
sudo bootctl list
Limine
sudo limine-update
Grub
sudo grub-mkconfig -o /boot/grub/grub.cfg
Tip
For others refer to their documentation/Arch Wiki page.
You can check currently booted kernel with command uname -r. It should give you for example:
7.2.0-rc7-1-ogc
Nvidia
If your laptop has an NVIDIA GPU, consider using the latest NVIDIA driver.
The driver package depends on your GPU generation:
- Turing and newer (GTX 16 series, RTX 20 series onward):
nvidia-open-dkms - Maxwell, Pascal, and Volta:
nvidia-580xx-dkms(AUR, the proprietary legacy driver is the only supported option for these generations)
Note
Some Ampere-equipped laptops may crash with the open driver due to GSP firmware issues, in that case use the proprietary driver instead.
Both are DKMS packages and work with custom kernels, while the regular nvidia package works only with the stock Arch kernel.
You should also install nvidia-laptop-power-cfg
git clone https://gitlab.com/asus-linux/nvidia-laptop-power-cfg.git
cd nvidia-laptop-power-cfg
makepkg -sfi
If you haven’t done already enable nvidia services:
systemctl enable nvidia-suspend.service nvidia-hibernate.service nvidia-resume.service
systemctl enable --now nvidia-powerd
# Only enable this if you plan to use the feature (unless you know exactly what it does don't touch it)
# systemctl enable nvidia-suspend-then-hibernate.service
After a reboot you should see the GPU turning on when needed and off when it’s not needed anymore.
Additionally you should query the status of your GPU with
cat /proc/driver/nvidia/gpus/bus_address/power
the bus_address will be different on each model, just use the autocompletion feature of bash spamming tab; the correct result is similar to this:
S0ix Power Management:
Platform Support: Supported
Status: Enabled
If S0ix platform support is supported you want to ensure it is enabled: this is important for sleep and idle power consumption!
Make sure you also install the vulkan adapter for mesa as well:
# AMD iGPU
sudo pacman -S vulkan-radeon nvidia-utils vulkan-icd-loader
# Intel iGPU
sudo pacman -S vulkan-intel nvidia-utils vulkan-icd-loader
Other distributions based on Arch
EndeavourOS
When installing EndeavourOS do not use the option with the Nvidia drivers preinstalled. That driver only works with the stock kernel. Use the default install option then install the DKMS package matching your GPU post-install: nvidia-open-dkms for Turing and newer GPUs or nvidia-580xx-dkms (AUR) for Maxwell, Pascal, and Volta.
Secure Boot
Arch
On Arch Linux, the easiest way is to use sbctl.
Note
For derivates, you can use the AUR package sbctl-dracut-conf or limine-dracut-support to quickly configure the system for secure boot.
Install that package, put your laptop in Setup Mode > Advanced Mode (F7) > Security, Secure Boot > Expert Key Management > Reset To Setup Mode on the UEFI menu and boot into archlinux, then issue:
sudo sbctl create-keys
sudo sbctl enroll-keys --microsoft
Grub bootloader
You can follow the wiki for more information.
Systemd-boot bootloader
In systemd-boot, you need to sign several files, which will depend on your specific setup, but the following commands should cover most cases. However, you can check the wiki to be sure.
sudo sbctl verify | sed -E 's|^.* (/.+) is not signed$|sbctl sign -s "\1"|e'
sudo sbctl sign -s -o /usr/lib/systemd/boot/efi/systemd-bootx64.efi.signed /usr/lib/systemd/boot/efi/systemd-bootx64.efi
Then it is best to reinstall the kernel and ensure it got signed.
# use the following command depending on your initramfs generator
# dracut (provided by sbctl-dracut-conf)
sudo dracut-regen
# mkinitcpio
sudo mkinitcpio -P
Limine bootloader
Limine has its own mechanism for signing the bootloader and kernels; check the wiki for more details like dracut or mkinitcpio, but it should be very simple.
Limine UEFI since 11.2.0 requires to enable automatic config checksum enrollment, set the following line in /etc/default/limine (provided by limine-dracut-support or limine-mkinitcpio-hook):
ENABLE_ENROLL_LIMINE_CONFIG=yes
Then run the following commands to enroll the config and update the bootloader:
sudo limine-enroll-config
sudo limine-update
Verify signed files
You have to ensure the bootloader is signed too, otherwise the UEFI won’t load it and display you an error message about insecure OS being prevented to be loaded.
To check signed files you have to use
sudo sbctl verify
sudo sbctl verify
Verifying file database and EFI images in /boot...
✗ /boot/EFI/BOOT/BOOTIA32.EFI is not signed
✗ /boot/EFI/BOOT/BOOTX64.EFI is not signed
✗ /boot/EFI/Linux/arch-linux.efi is not signed
✓ /boot/EFI/Linux/f1710a77781f46bcb9be1b9221102a38_linux.efi is signed
✓ /boot/EFI/limine/limine_x64.efi is signed
✗ /boot/vmlinuz-linux is not signed
In this case, I use limine along with UKI, which signs only a few files, but in principle it should be the bootloader and kernel-related files that should be signed, otherwise the system won’t boot.
After the first reboot your laptop will automatically exit setup mode and secure boot will work.
You can check it using this command:
sbctl status
Installed: ✓ sbctl is installed
Owner GUID: a9fbbdb7-a05f-48d5-b63a-08c5df45ee70
Setup Mode: ✓ Disabled # this should be disabled after the first reboot
Secure Boot: ✓ Enabled
Vendor Keys: microsoft
This is a do-and-forget thing: once the initial setup is done no manual intervention is needed and every new kernel will be automatically signed.
Warning
WARNING This is Arch’s official method; derivatives may vary, as in the case of CachyOS, so it is advisable to consult the wiki or forums for the respective Arch derivative.
CachyOS
To enable Secure Boot on CachyOS, please follow the CachyOS Secure Boot Setup guide.
Fedora Workstation Setup Guide
A friendly guide for setting up Fedora Workstation on ASUS laptops
Newcomers should start by reading the Intro guide. For additional information not covered by this guide, consult the official Fedora Documentation. For simple USB stick flashing: Fedora Media Writer
Contents
About Fedora Versions
This guide is updated for the current stable release of Fedora.
However, please be aware:
- You need to keep Fedora up to date. If you are 2 versions behind, your OS is no longer supported by Fedora (updates, security, etc.)
- E.g. If Fedora 44 is the current stable release, and you are on Fedora 42, your OS is unsupported.
Installation
- Download the latest Fedora Workstation (or KDE Plasma Edition) ISO file from the official Fedora website and write it to a USB stick.
Note
If you want something else than GNOME or KDE as your Desktop Environment, you can check out Fedora Spins.
-
If you have difficulties starting the live environment from USB, in the Fedora boot menu select: Troubleshooting → Start Fedora in basic graphics mode
-
Follow the steps of the installer, and remove the USB stick when you reboot
-
After rebooting, the installer will present a series of dialog boxes to configure wireless networking, privacy, third party repositories, cloud services, and finally a local user account. Ensure that third party repositories are enabled, so that the proprietary NVIDIA drivers can be installed (covered later in this guide).
Setup
Using the Terminal
This guide requires typing terminal commands. To type them, start the Terminal application, which opens a window that has a command prompt.
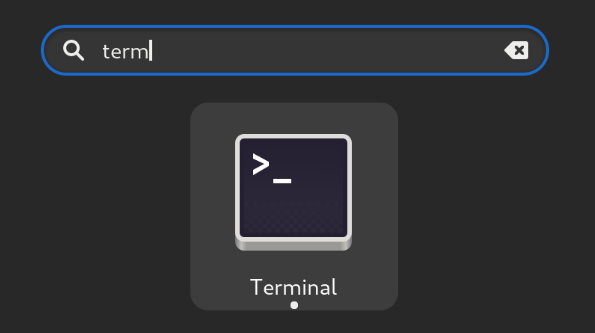
To open the Terminal, simply press the Windows/Super key to bring up the Start Menu (KDE) or the Activities view (GNOME), and start typing “term” in the search box. Click on the search result.
Commands that have sudo in front are administrator commands, and may require you to type in your password.
Update Fedora
The first thing you want to do is definitely make sure your OS is up-to-date, which can address some issues like WiFi not being functional.
Tip
If you have trouble getting WiFi or Wired Internet to work (commonly seen on newly released products), use your phone hotspot via USB to get internet access.
Simply run this in the terminal then reboot and you are good to go
sudo dnf update -y
Or if you don’t want to use terminal:
- Open the “Software” application. (KDE Users should use “Discover”)
- Navigate to Updates tab
- Click the Refresh-button in the top left corner
- Download all available updates
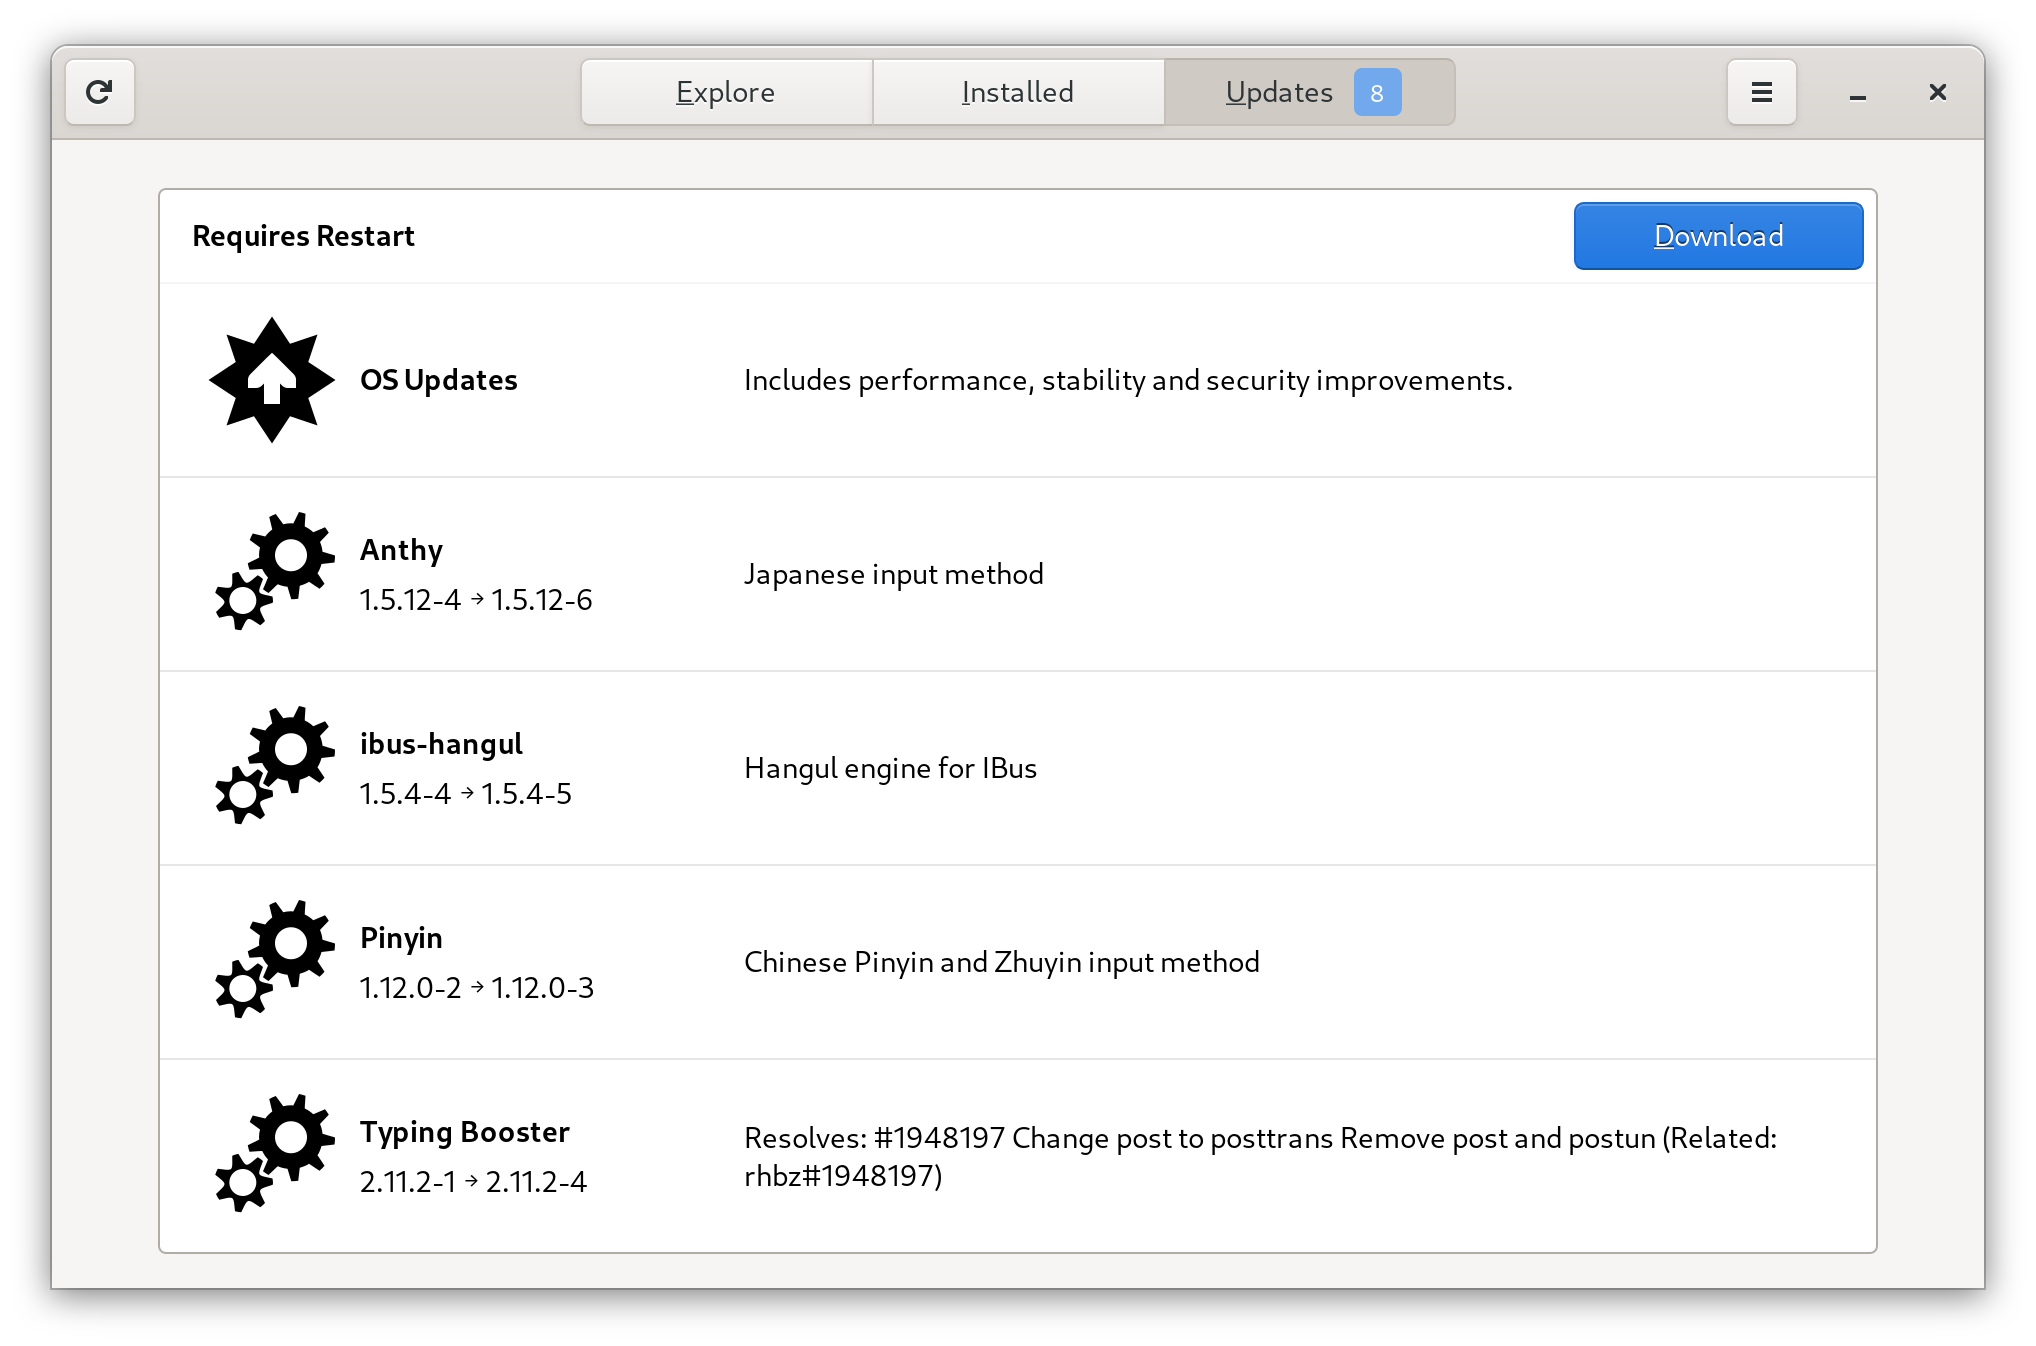
- After the updates have been downloaded, click the “Restart & Update” button
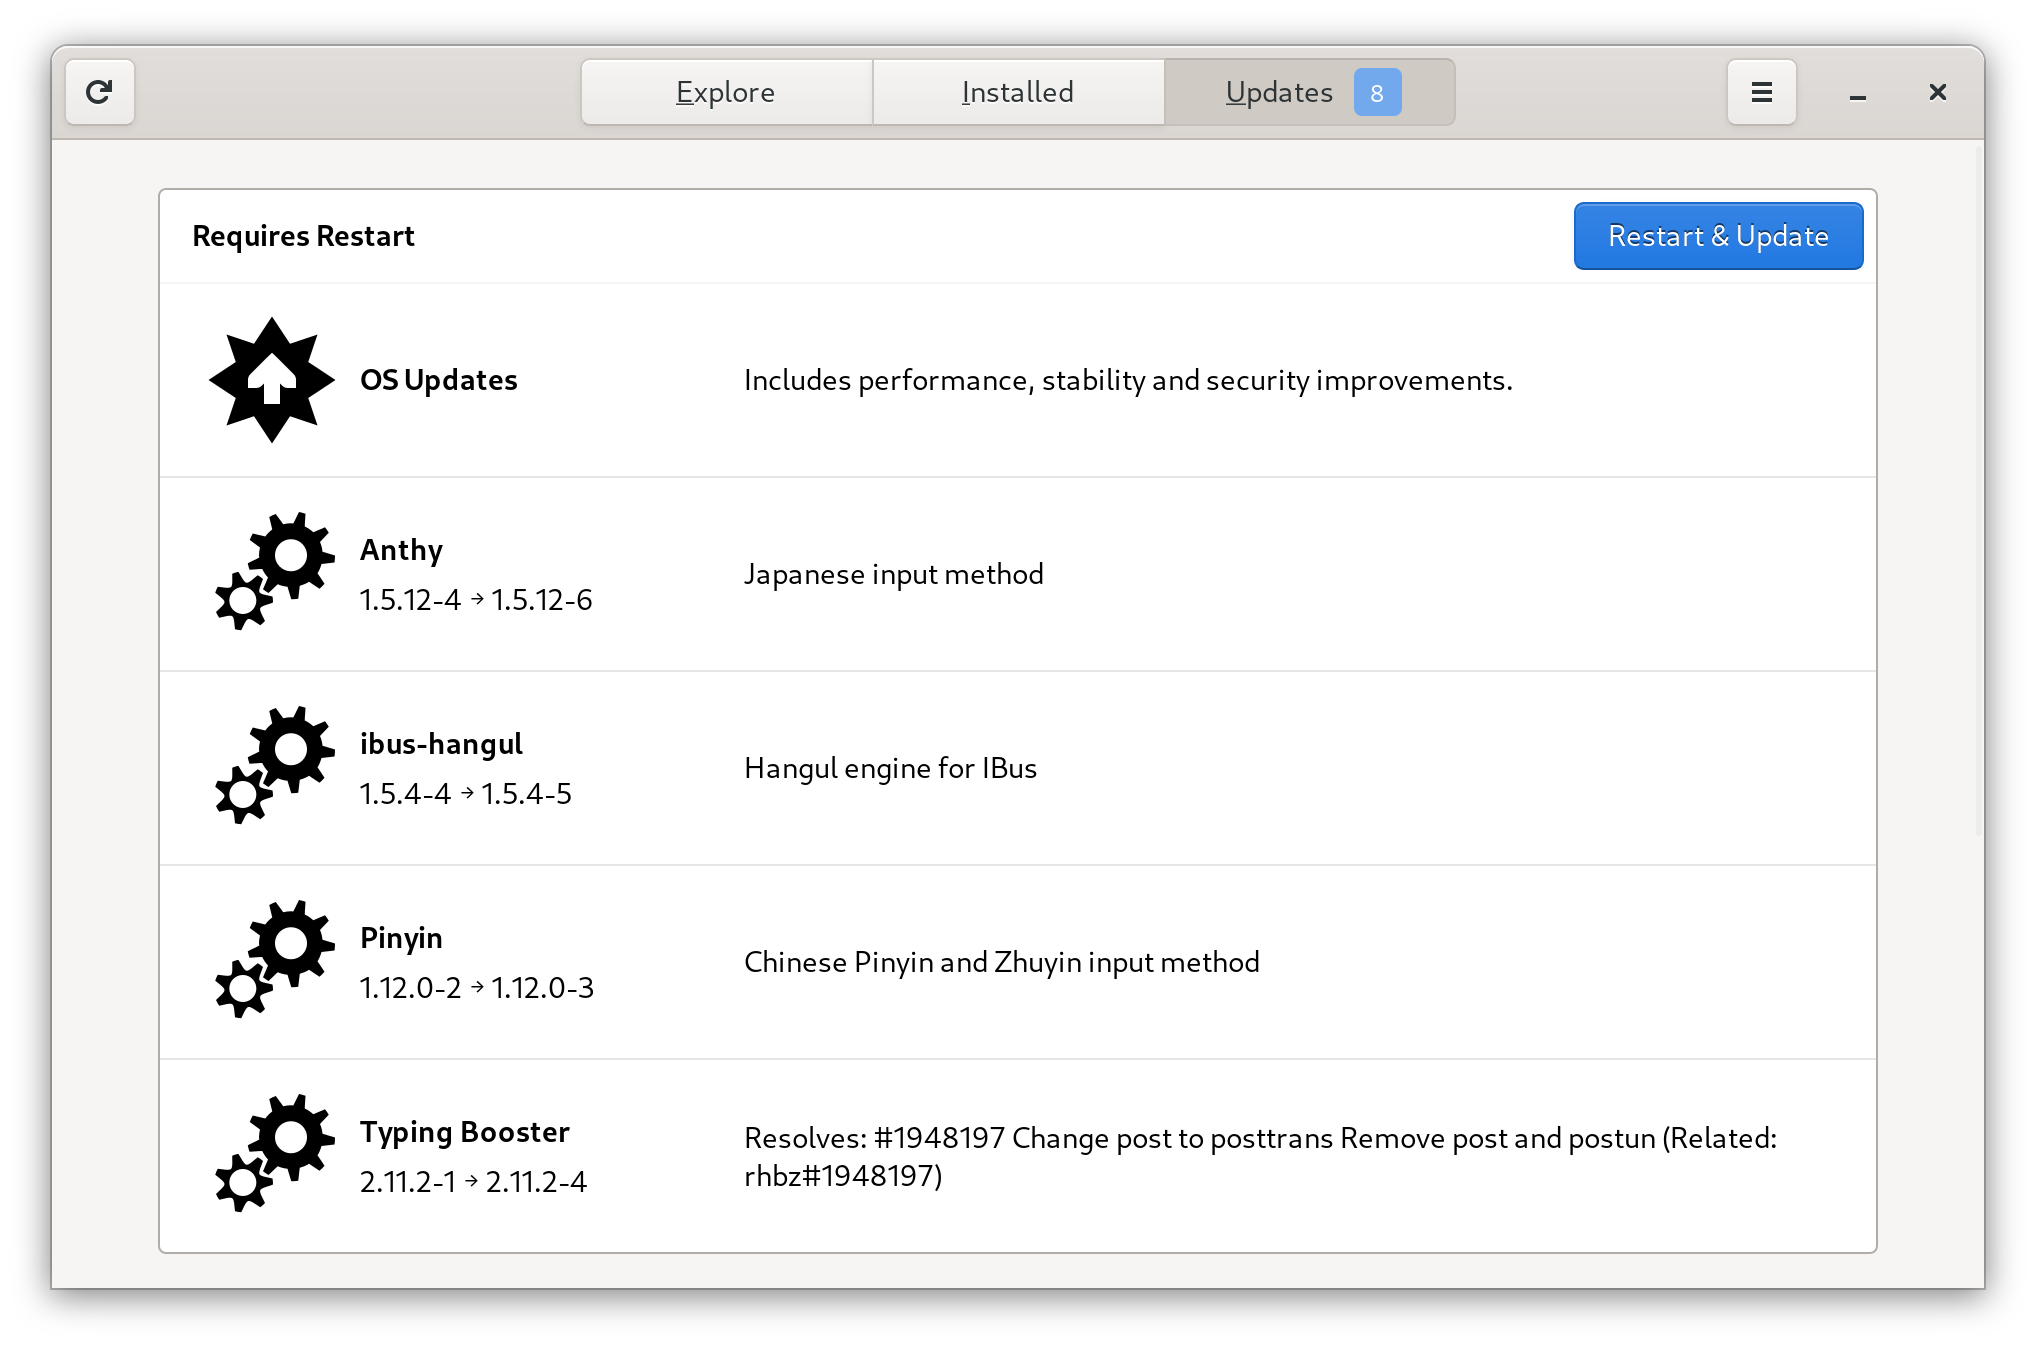
Wait until the updates are installed.
Note
It is recommended to restart the system to avoid problems with outdated packages loaded into RAM.
Enabling the Terra Repository
ASUS Linux packages and tools are currently packaged on the Terra Repository for Fedora. Add the Terra repo with the following commands:
sudo dnf install --nogpgcheck --repofrompath 'terra,https://repos.fyralabs.com/terra$releasever' terra-release terra-gpg-keys
Warning
The older community-maintained COPR repository is no longer recommended and is currently broken due to expired signing keys, so it should not be used. If you previously enabled it, migrate to the Terra repository by using the above command, and by deleting the old copr repository with
sudo dnf copr remove lukenukem/asus-linux. Don’t forget to reinstall all ASUS Linux tools.
Asusctl
This section covers installing asusctl and its supporting software. This enables controls for the Asus ROG hardware on the laptop.
sudo dnf install asusctl
The asusd service is started automatically by a udev rule, so it does not need to be enabled. You can check its status or restart it manually:
systemctl status asusd.service
# or, to restart it:
sudo systemctl restart asusd.service
asusd manages platform profiles and CPU EPP settings itself. Running an external power management daemon (such as power-profiles-daemon or tuned) alongside asusd can cause race conditions and contention over the platform profile and EPP preferences. You have two options:
- Let
asusdmanage profiles and disable the external daemon. Since Fedora 41,tunedis the default power profile daemon. Note that KDE Plasma’s PowerDevil can respawnpower-profiles-daemonthrough DBus activation even after it is disabled, so be sure to mask it instead:
sudo systemctl mask --now power-profiles-daemon.service
# or, if you use tuned:
sudo systemctl mask --now tuned.service tuned-ppd.service
- Keep the external daemon and disable
asusd’s profile management by setting the following tofalsein/etc/asusd/asusd.ron:
change_platform_profile_on_ac: false,
change_platform_profile_on_battery: false,
platform_profile_linked_epp: false,
See issue #264 for details.
ROG Control Center
ROG Control Center is a GUI tool that can be used to configure asusctl. After adding the Terra repository as described above, you can now install the tool:
sudo dnf install asusctl-rog-gui
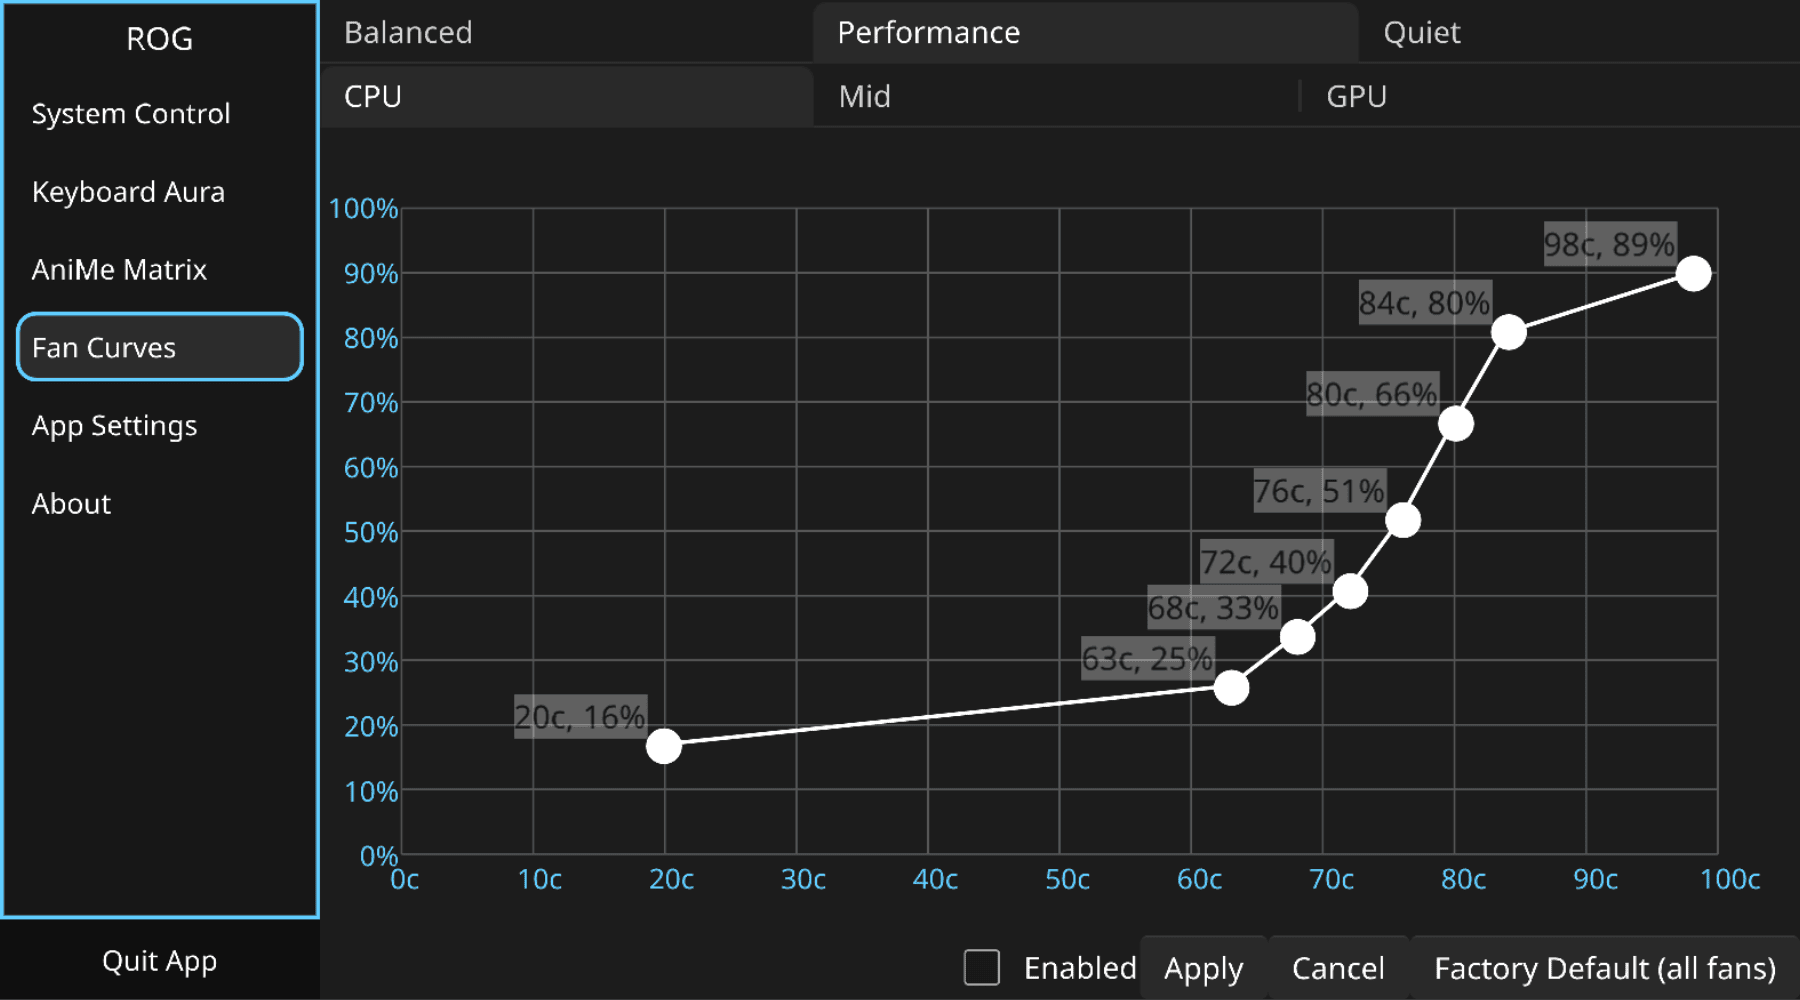
Note
For complete functionality and driver support, it is recommended to use a Kernel version of 6.19 or greater.
Install Nvidia Graphics Drivers
Note
AMD dGPU laptop owners can skip this section.
Important
If you have secure boot enabled at this point, you must disable it to continue. Once you’re finished installing drivers, see the section on enabling Secure Boot later to re-enable it.
- If you didn’t enable third-party repositories during the initial install wizard, you can use the following command to enable the RPM Fusion repositories required to install the Nvidia drivers:
sudo dnf install https://mirrors.rpmfusion.org/free/fedora/rpmfusion-free-release-$(rpm -E %fedora).noarch.rpm https://mirrors.rpmfusion.org/nonfree/fedora/rpmfusion-nonfree-release-$(rpm -E %fedora).noarch.rpm
Note
For Laptops with NVIDIA card older than Turing, install the Negativo17 instead.
- Install the Nvidia drivers:
sudo dnf install akmod-nvidia xorg-x11-drv-nvidia-cuda
Important
Please remember to wait after the RPM transaction ends to allow the kmod be built. This can take up to 5 minutes on older systems, and about 2 minutes on newer systems.
- Reboot your system
For more details, see the official documentation for RPM Fusion.
Graphics Switching
See GPU Switching for how to manage the dGPU and MUX.
Optional Steps
Installing RPM Fusion
Usually, when you enable third-party repositories, RPM-Fusion is enabled automatically. However, if it is not, you can follow this guide.
sudo dnf install https://mirrors.rpmfusion.org/free/fedora/rpmfusion-free-release-$(rpm -E %fedora).noarch.rpm https://mirrors.rpmfusion.org/nonfree/fedora/rpmfusion-nonfree-release-$(rpm -E %fedora).noarch.rpm
Hardware Accelerated codecs
Fedora does not include the codecs needed to use Vaapi on Intel, AMD or Nvidia in its repositories due to potential legal issues. Therefore, you need to install the codecs in your system (Flatpak and containers (like distrobox, toolbx, docker, podman, etc.) must install their own codecs, as they do not share the system ones).
You need RPM-Fusion repos and follow this guide.
Enabling Secure Boot
With Fedora 36 and above, it has become super easy to auto sign kernel modules and enable secure boot. To enable auto signing follow these steps:
Install the required tools
sudo dnf install kmodtool akmods mokutil openssl
Initiate the key enrollment
Note
This step requires a password, it doesn’t need to be fancy. You’ll just need it once during the enrollment.
sudo kmodgenca -a
sudo mokutil --import /etc/pki/akmods/certs/public_key.der
Reboot to enroll the key
When you reboot, the MOK Manager will appear, just hit “Enroll MOK” and enter the password set in step 2. After that is completed choose “Continue boot”.
Rebuild the kernel module
If you installed the nvidia drivers before key enrollment, you must run the following command
sudo akmods --force --rebuild
sudo dracut --force
Then reboot the system:
sudo systemctl reboot
After booting, verify that the rebuilt NVIDIA module is loaded:
nvidia-smi
Fedora Atomic Setup Guide
A Quickstart Guide to Fedora Atomic Desktops (Silverblue, Kinoite) and Asus-Linux
This guide covers the Fedora Atomic Desktops (Silverblue, Kinoite, Sway Atomic, Budgie Atomic, COSMIC Atomic), which use rpm-ostree for package layering. If you use a Universal Blue image such as Bazzite, see the Bazzite guide instead.
Contents
Installation
Note
Official Fedora packages are maintained by Fyra Labs, the creators of Ultramarine Linux, in Terra repository: they are part of OGC as asus-linux is.
Read the Intro guide first to avoid bad surprises.
Enabling the Terra Repository
ASUS Linux packages and tools are currently packaged on the Terra Repository for Fedora. Add the Terra repo with the following commands:
curl -fsSL https://raw.githubusercontent.com/terrapkg/packages/f$(rpm --eval '%{fedora}')/anda/terra/release/terra.repo | pkexec tee /etc/yum.repos.d/terra.repo
sudo rpm-ostree install terra-release terra-gpg-keys
Asusctl
This section covers installing asusctl and its supporting software. This enables controls for the Asus ROG hardware on the laptop.
sudo rpm-ostree install asusctl
asusd manages platform profiles and CPU EPP settings itself. Running an external power management daemon (such as power-profiles-daemon or tuned) alongside asusd can cause race conditions and contention over the platform profile and EPP preferences. You have two options:
- Let
asusdmanage profiles and disable the external daemon. Since Fedora 41,tunedis the default power profile daemon. Note that KDE Plasma’s PowerDevil can respawnpower-profiles-daemonthrough DBus activation even after it is disabled, so be sure to mask it instead:
sudo systemctl mask --now power-profiles-daemon.service
# or, if you use tuned:
sudo systemctl mask --now tuned.service tuned-ppd.service
- Keep the external daemon and disable
asusd’s profile management by setting the following tofalsein/etc/asusd/asusd.ron:
change_platform_profile_on_ac: false,
change_platform_profile_on_battery: false,
platform_profile_linked_epp: false,
See issue #264 for details.
ROG Control Center
ROG Control Center is a GUI tool for configuring few aspects of asusctl. After adding the Terra repository as described above, you can now install the tool:
sudo rpm-ostree install asusctl-rog-gui
now reboot your system to apply the changes
Graphics Switching
See GPU Switching for how to manage the dGPU and MUX.
After rebooting
The asusd service is triggered by a udev rule after the keyboard driver is ready, so it does not need to be enabled and is not supposed to be. You can check its status with:
systemctl status asusd.service
Optional Steps
Installing RPM Fusion
Usually, when you enable third-party repositories, RPM-Fusion is enabled automatically. However, if it is not, you can follow this guide.
sudo dnf install https://mirrors.rpmfusion.org/free/fedora/rpmfusion-free-release-$(rpm -E %fedora).noarch.rpm https://mirrors.rpmfusion.org/nonfree/fedora/rpmfusion-nonfree-release-$(rpm -E %fedora).noarch.rpm
Hardware Accelerated codecs
The Atomic versions of Fedora do not include codecs in the system image, because these distros are focused on modifying as little as possible to ensure stability. It is recommended to use Flatpak, Distrobox, Toolbox, or any other type of container, as these do not share codecs with the system and prevent you from having to install them. However, if you want to install them, you can follow this guide but remember install RPM-Fusion repos first.
Tip
Universal Blue and its images already include the codecs in the system, so it is not necessary to perform these procedures.
Flatpak Cleaning
In order to streamline our dependency on flatpak it is worthwhile to have everything working with the same fundamentals.
flatpak remote-delete fedora
flatpak remote-add --if-not-exists flathub https://flathub.org/repo/flathub.flatpakrepo
The steps above will uninstall the packages from the Fedora remote, so the following command will install the Flathub versions instead (Apply only on Silverblue version).
flatpak install org.gnome.Calculator org.gnome.Calendar org.gnome.Characters org.gnome.Connections org.gnome.Contacts org.gnome.Papers org.gnome.Logs org.gnome.Loupe org.gnome.Maps org.gnome.NautilusPreviewer org.gnome.Snapshot org.gnome.Weather org.gnome.baobab org.gnome.clocks org.gnome.font-viewer org.gnome.Showtime org.gnome.TextEditor org.gnome.Decibels
Replace Firefox RPM with Flathub Flatpak and Force Wayland
sudo rpm-ostree override remove firefox firefox-langpacks
flatpak install flathub org.mozilla.firefox org.freedesktop.Platform.ffmpeg-full
Nvidia
Nvidia in Atomic versions requires key enrollment. However, you may need to repeat this process after an update, although you can use this, so below you will find two options.
Recommended approach
The recommended approach is to use or rebase Bazzite, Bluefin, Aurora, or a vanilla image of Universal Blue with the Nvidia driver already configured. If you rebase to Bazzite, see the Bazzite guide for installing asusctl.
If you want rebase follow this guide.
Manual approach
If you are unable or unwilling to use the method described above, you can follow these steps:
Add RPM-Fusion repos:
sudo rpm-ostree install --apply-live https://mirrors.rpmfusion.org/free/fedora/rpmfusion-free-release-$(rpm -E %fedora).noarch.rpm https://mirrors.rpmfusion.org/nonfree/fedora/rpmfusion-nonfree-release-$(rpm -E %fedora).noarch.rpm
Note
If your laptop has an NVIDIA card older than Turing, the repo to install is Negativo17.
Install Nvidia drivers:
sudo rpm-ostree install akmod-nvidia xorg-x11-drv-nvidia xorg-x11-drv-nvidia-cuda
sudo rpm-ostree kargs --append=rd.driver.blacklist=nouveau,nova_core --append=modprobe.blacklist=nouveau,nova_core
Wait for the module to be built, then reboot:
sudo systemctl reboot
After booting, verify that the NVIDIA driver is loaded:
nvidia-smi
Bazzite Setup Guide
A friendly guide for setting up Bazzite on ASUS laptops
Newcomers should start by reading the Intro guide.
Bazzite is a gaming-oriented atomic Fedora image based on Universal Blue. Like other atomic Fedora images it uses rpm-ostree, and asusctl is not preinstalled. Bazzite ships Homebrew preconfigured, which is the supported way to install asusctl.
Contents
Installing Asusctl
The supported way on Bazzite is the ujust asus helper. It installs the Universal Blue Homebrew casks asusctl-linux and rog-control-center-linux from the ublue-os/tap tap, and enables the required services. No reboot is needed and the installation survives rebasing:
# <https://github.com/ublue-os/bazzite/blob/b798170d195f8466f687b61be1831c1ec785d942/system_files/desktop/shared/usr/share/ublue-os/just/82-bazzite-apps.just#L265-L405>
ujust asus
The services are enabled automatically.
Power profiles
Important
Power profiles:
asusdmanages platform profiles and CPU EPP settings itself via the ACPIplatform_profileinterface. Running an external power profiles daemon (such aspower-profiles-daemonortuned) alongsideasusdcan cause race conditions over/sys/firmware/acpi/platform_profileand CPU EPP preferences. You have two options:
- Let
asusdmanage profiles and disable the external daemon. Note that KDE Plasma’s PowerDevil can respawnpower-profiles-daemonthrough DBus activation even after it is disabled, so be sure to mask it instead:sudo systemctl mask --now power-profiles-daemon.service # or, if you use tuned: sudo systemctl mask --now tuned.service tuned-ppd.service
- Keep the external daemon and disable
asusd’s profile management by setting the following tofalsein/etc/asusd/asusd.ron:change_platform_profile_on_ac: false, change_platform_profile_on_battery: false, platform_profile_linked_epp: false,A common way to switch profiles is binding the
Fn+F5key toasusctl profile nextAvailable profiles vary by system, seeasusctl profile list.
Graphics Switching
See GPU Switching for how to manage the dGPU and MUX.
Ultramarine Setup Guide
A friendly guide for setting up Ultramarine on ASUS laptops
Newcomers should start by reading the Intro guide.
For general Ultramarine setup and usage information, see the official Ultramarine guide.
Warning
This guide is maintained by the community. If you find an issue with the Ultramarine documentation, please contribute a fix or report it to the community.
Contents
About Ultramarine Versions
This guide is written for the current stable release of Ultramarine. Ultramarine is based on Fedora and follows the same release pattern.
You need to keep Ultramarine up to date. If you are two versions behind, your operating system is no longer supported with updates or security fixes.
For example, if Ultramarine 44 is the current stable release, Ultramarine 42 is unsupported.
Post-Installation
Follow the Ultramarine post-installation guide for useful steps such as installing NVIDIA drivers.
Setup
Asusctl
This section covers installing asusctl and its supporting software. It enables controls for ASUS ROG hardware on the laptop.
sudo dnf install asusctl
Important
Power profiles:
asusdmanages platform profiles and CPU EPP settings itself via the ACPIplatform_profileinterface. Running an external power profiles daemon (such aspower-profiles-daemonortuned) alongsideasusdcan cause race conditions over/sys/firmware/acpi/platform_profileand CPU EPP preferences. You have two options:
- Let
asusdmanage profiles and disable the external daemon. Since Ultramarine is Fedora-based,tunedis the default power profile daemon. Note that KDE Plasma’s PowerDevil can respawnpower-profiles-daemonthrough DBus activation even after it is disabled, so be sure to mask it instead:sudo systemctl mask --now power-profiles-daemon.service # or, if you use tuned: sudo systemctl mask --now tuned.service tuned-ppd.service
- Keep the external daemon and disable
asusd’s profile management by setting the following tofalsein/etc/asusd/asusd.ron:change_platform_profile_on_ac: false, change_platform_profile_on_battery: false, platform_profile_linked_epp: false,A common way to switch profiles is binding the
Fn+F5key toasusctl profile nextAvailable profiles vary by system, seeasusctl profile list.
ROG Control Center
ROG Control Center is a GUI tool for configuring some aspects of asusctl. It is available as a separate package:
sudo dnf install asusctl-rog-gui
Reboot after installing asusctl:
sudo systemctl reboot
Note
ASUS releases new products every year, so not every device is guaranteed to work with the current Fedora kernel. Depending on your device, you may need a kernel with newer ASUS patches, such as the ASUS Armoury driver available in Linux 6.19 and later, or the CachyOS kernel. This is optional and depends on your device and needs.
Graphics Switching
See GPU Switching for how to manage the dGPU and MUX.
Optional Steps
Enabling Secure Boot
The recommended and easiest way to sign the kernel, whether you switched to systemd-boot, installed NVIDIA drivers, or changed the kernel, is to use sbctl.
CachyOS Kernel
Note
Newer devices may require a custom kernel with additional patches. The CachyOS kernel includes newer patches and can be tried if the stock kernel does not support your device properly.
Install CachyOS Kernel
Ultramarine provides umcli to simplify switching to the CachyOS kernel:
um tweaks enable cachyos-kernel
Note
If Secure Boot is enabled, sign the new kernel with
sbctl.
openSUSE Tumbleweed Setup Guide
A friendly setup guide for openSUSE on ASUS laptops
Newcomers should start by reading the Intro guide.
Warning
This page will not be updated directly by the core team; this guide has been updated by the community on Discord. If there are any issues with the openSUSE documentation, feel free to contribute.
Contents
About openSUSE Tumbleweed
openSUSE Tumbleweed is a rolling release distribution and should be chosen over openSUSE Leap. Tumbleweed gives users access to the latest software packages and updates, providing better compatibility with ASUS laptops than Leap. However, users with newer laptop models may run into issues. Please see the Considerations section for more details.
All updates to the official repos are incorporated into snapshots and tested with openQA prior to release. This means that Tumbleweed is slightly behind a bleeding-edge distro, such as Arch, but that all updates to the official repos are thoroughly tested.
KDE Plasma is the flagship openSUSE Tumbleweed Desktop Environment. The installer also supports GNOME, Xfce, and many others (including Window Managers).
Considerations
Users coming from other distributions may run into issues when using Tumbleweed due to its default settings. This guide attempts to point out some of these within the relevant sections. A few general items that a user should be aware of before trying openSUSE are:
- Custom kernels are difficult with openSUSE. This means the rog/asus-kernel is not supported. Newer laptops will need to wait until any required patches are merged from the rog/asus-kernel into the upstream kernel.
- The package manager is
zypper, which is RPM-based and relatively similar to Fedora’sdnf. The Arch wiki provides a helpful table comparing common package manager commands. zyppershould be used to install packages instead of YaST, KDE Discover, or GNOME Software. These GUI tools may still be useful for flatpaks and searching, but do not use them to install other packages.- Occasional mirror issues, while rare, do exist. Workarounds are required to continue updating the system and installing packages.
- Package updates in Tumbleweed are performed through
zypper dup(dist-upgrade), notzypper up(update). For more information, see the openSUSE wiki. - OpenSUSE is not as widely used as Fedora or Arch, so some software may not be available. Flatpaks, the Open Build Service, and third-party repositories help alleviate this issue. Note that only official packages are tested as part of the Tumbleweed openQA testing.
- OpenSUSE uses the concept of patterns, which include base and recommended software packages. These patterns may result in packages being re-installed, even if you specifically removed them. More information is available on the openSUSE user documentation project.
- OpenSUSE community websites may provide “one-click installers”, which can cause more trouble than they’re worth. Avoid using these.
- OpenSUSE provides excellent support for the btrfs file system, and supports automatic bootable btrfs snapshots out of the box.
- OpenSUSE provides the YaST GUI tool for system management. YaST is polarizing, but may be helpful for new users to get a better idea of the system configuration. Many operations should still be performed via the terminal instead.
- asusctl is packaged for openSUSE Tumbleweed in the Tuatara repository, the openSUSE counterpart of the Terra repository. If the repository stops generating new packages, the best thing you can do is report the issue; or, if you can fix it, it would be best if you became a package maintainer.
Preparations
Prior to installation of openSUSE Tumbleweed, follow the preparations in the Prerequisites guide. The list below gives a summary of the important subsections to review.
- Backup Proprietary eSupport Drivers Folder - Backing up the proprietary ASUS drivers.
- Disable Secure Boot - Disabling secure boot for compatibility with the proprietary Nvidia drivers.
- Use the Laptop Screen - Background on installation problems that may arise due to external screens.
Installation
Installation Media
The openSUSE Tumbleweed website contains all of the installation images. The offline image is much larger than the network image, but allows installing all packages included without an internet connection. All of the packages will be dated to when the offline image was created. The net installer will pull the latest packages from the openSUSE repositories. It is possible to do this in the offline installer by connecting to the internet and enabling the internet repositories.
Live images also exist on the openSUSE Tumbleweed website. These are located under the Alternative Downloads link on the page. These Live images are similar to what users are used to with other distributions. Live images should be safe for most users. However, the openSUSE Tumbleweed website and openSUSE User Documentation Project warn that issues may occur when installing with a Live image. Please review these warnings on the associated links prior to continuing.
Installing openSUSE Tumbleweed
- Download the chosen ISO file from the openSUSE Tumbleweed website and write it to a USB stick. The network and Live ISOs requires a fast internet connection due to the number of downloads.
Note
Ventoy has known issues and is not considered supported by openSUSE. It can be used, but manual intervention is required after installation.
-
The online repositories can be enabled with the offline ISO to pull the latest packages. The network ISO does this automatically.
-
Follow the steps of the installer, choosing a partitioning scheme and Desktop Environment.
-
The final Summary page allows disabling Secure Boot, if it will not be used, and allows customizing the Software that will be installed.
-
The system will automatically reboot after installation.
-
At the grub menu after reboot, press the E key to modify the boot parameters. Nvidia users should add
modprobe.blacklist=nouveauto the Kernel command line arguments to ensure the Nouveau drivers do not cause issues.
Note
If Ventoy was used, the Kernel command line arguments may contain
rdinit=/vtoy/vtoy. This MUST be removed as it will prevent the system from booting. Include this change in the step below.
-
Once the system boots, log in and make any necessary changes to the
GRUB_CMDLINE_LINUX_DEFAULTparameter in/etc/default/grub. -
Regenerate grub to prevent repeating the previous steps on every boot.
sudo grub2-mkconfig -o /boot/grub2/grub.cfg
Setup
Notes on Btrfs Snapshots
It is helpful to take snapshots throughout the setup process if using the btrfs filesystem. Pre and post snapshots are automatically taken when installing and updating packages. The “openSUSE-style” snapshots allow booting into the last-known working state through the grub menu. The system will boot into a read-only filesystem based on the chosen snapshot, which the user can explore to ensure the system is working. The system can be restored to the snapshot using the command snapper rollback. More information is available on the openSUSE user documentation project.
Remove the Installer ISO Repository
The openSUSE installer automatically adds a repo entry for the installation media. This feature is more geared toward offline or enterprise systems, not personal devices. Removing the repository will ensure that updates will not fail if the installation media is not found. Command line is the preferred method of removal, but the YaST GUI can be used.
- List the currently active repositories:
sudo zypper lr -d
-
From the outputs, identify the repo number that corresponds to the installation media. The offline image will likely have DVD in the title. The network image should include a date in the title.
-
Disable the repo, replacing
#with the number identified from the previous steps:
sudo zypper mr -d -F #
- Remove the repo, replacing
#with the number identified from the previous steps:
sudo zypper rr #
- Force a refresh of the repositories:
sudo zypper ref -f
Update the System
- Refresh the repositories:
sudo zypper ref
- Update the system via dist-upgrade (dup):
sudo zypper dup
Adding the wheel group
By default, openSUSE does not automatically add the user to the wheel group. This prevents asusctl and ROG Control Center accessing DBus when run with user privileges. The resulting error messages are similar to Error: org.freedesktop.DBus.Error.AccessDenied. Additionally, the default setup requires the root password when a user runs sudo. This may cause confusion if the user is coming from other distributions. The openSUSE wiki has a guide for setting up sudo behavior in a way that users may be more familiar with.
- Open the terminal and switch to the root user:
su
- The wheel group should be present by default, but can be verified with:
grep ^wheel /etc/group
- If the wheel group is somehow not present, add it:
groupadd wheel
- Add a user to the wheel group, replacing USERNAME with the desired user:
usermod -aG wheel USERNAME
- Optionally, verify the user was added to the wheel group, replacing USERNAME with the desired user:
id USERNAME
- Log out or restart for the changes to apply.
Third Party Repositories
The official openSUSE repositories have many restrictions due to strict copyright and IP laws. Third party repositories contain additional packages that are not or cannot be included in the openSUSE OSS and non-OSS repos. Using dependencies from multiple repositories may result in instability and issues. To avoid this, it is recommended to change the vendor for packages to the third party repositories being used. The openSUSE wiki has a guide for setting up commonly used third party repos. Note that only the official repos are included in the openQA testing, so it will not catch any issues related to the additional packages.
All repos use priorities (higher number = lower priority). The official repos are added with the priority of 99 (default). Adding third party repos with a lower number results in packages being installed from them, if available.
Install Nvidia Graphics Drivers
A guide to installing the proprietary Nvidia drivers can be found on the openSUSE wiki. Verify the numbering scheme for the Nvidia card using the instructions on the wiki. The instructions below show how to install the current G07 series, for newer devices. The older G06 series is now considered legacy.
-
Open the file
/etc/zypp/zypp.conf. -
Ensure the following line is not commented out:
multiversion = provides:multiversion(kernel)
- The Nvidia repository is usually added automatically during installation (package
openSUSE-repos-Tumbleweed-NVIDIA). If it is missing, add it with auto-refresh and a non-default priority (e.g., 90):
sudo zypper ar --priority 90 --refresh https://download.nvidia.com/opensuse/tumbleweed NVIDIA
- For GPUs supported by the open source module, install the
nvidia-open-driver-G07-signed-kmp-metapackage. Otherwise, install the proprietary driver withnvidia-driver-G07-kmp-meta, which should result in all needed packages being installed:
sudo zypper in nvidia-open-driver-G07-signed-kmp-meta
- Search for G07 to verify the additional packages (e.g.,
nvidia-glG07) were installed:
zypper se G07
-
If matching G07 Nvidia packages do not have an
iori+next to them, install them. -
Note that the driver installation process may take 10+ minutes.
-
After installation, one can verify the driver version:
sudo modinfo -F version nvidia
- Reboot the system.
Update System Boot Configuration for Nvidia
-
The Nvidia driver installation should handle adding the required Kernel command line arguments.
-
If issues are encountered, try adding the following to GRUB_CMDLINE_LINUX in
/etc/default/grub:
modprobe.blacklist=nouveau rd.driver.blacklist=nouveau nvidia-drm.modeset=1
- After the modifications, regenerate grub with:
sudo grub2-mkconfig -o /boot/grub2/grub.cfg
Asus-Linux Software
Adding the Tuatara Repository
Tuatara is the openSUSE counterpart of the Terra repository, providing packages for ASUS laptops including asusctl and the ROG Control Center.
Note
Tuatara currently supports openSUSE Tumbleweed only. If your system releasever is not
tumbleweed(but compatible with it), replace$releaseverin the following command withtumbleweedmanually.
# add the repository and install asusctl
sudo zypper install --plus-repo 'https://repos.fyralabs.com/tuatara-$releasever' tuatara-release

# refresh the repositories and install asusctl
sudo zypper refresh
sudo zypper install --allow-vendor-change asusctl
Asusctl
- The tlp software is known to conflict with power-profiles-daemon and should be removed. It is installed with the default openSUSE installer settings.
sudo zypper rm tlp
- Next, install asusctl:
sudo zypper in asusctl
Important
Power profiles:
asusdmanages platform profiles and CPU EPP settings itself via the ACPIplatform_profileinterface. Running an external power profiles daemon (such aspower-profiles-daemonortuned) alongsideasusdcan cause race conditions over/sys/firmware/acpi/platform_profileand CPU EPP preferences. You have two options:
- Let
asusdmanage profiles and disable the external daemon:sudo systemctl disable --now power-profiles-daemon.service
- Keep the external daemon and disable
asusd’s profile management by setting the following tofalsein/etc/asusd/asusd.ron:change_platform_profile_on_ac: false, change_platform_profile_on_battery: false, platform_profile_linked_epp: false,A common way to switch profiles is binding the
Fn+F5key toasusctl profile nextAvailable profiles vary by system, seeasusctl profile list.
- Either restart the system, or run the following command to immediately begin using asusctl:
sudo systemctl start asusd
- Note that due to the difficulty of custom kernel support on openSUSE Tumbleweed, features for the newest laptop models may not always work.
ROG Control Center
The optional ROG Control Center GUI tool can be installed to assist with control of asusctl settings.
sudo zypper in asusctl-rog-gui
Graphics Switching
See GPU Switching for how to manage the dGPU and MUX on ASUS laptops, including Cardwire.
Cardwire is not yet packaged for openSUSE, so it must be built from source; see its documentation.
If you still require VFIO for virtual machines, supergfxctl remains available from the official Tumbleweed repositories:
sudo zypper in supergfxctl
sudo systemctl enable --now supergfxd
Optional Steps
Enabling ZRAM
Unlike Fedora, zram is not enabled by default. The zram-generator package can be installed to set up and use zram instead of traditional swap. The Arch wiki’s guide on zram can be used as a reference. The steps below set up zram with a common default configuration and one additional option:
-
Ensure zswap is disabled to avoid conflicts with zram. The process can be found on the Arch wiki.
-
Install zram-generator to handle zram creation:
sudo zypper in zram-generator
-
Create a zram configuration file at one of zram-generator’s expected locations, such as
/usr/lib/systemd/zram-generator.conf. -
Edit the newly created configuration file.
-
Default configuration: add the following to the configuration file:
[zram0]
zram-size = min(ram, 8192)
- Optionally, the
compression-algorithmparameter can be added to specify the compression algorithm used by zram. If it is not set, the kernel’s default algorithm is used.
compression-algorithm = zstd
-
Reboot the system.
-
Verify zram was added by using the
zramctlorswaponcommands. Azram0item should be present.
Open Build Service
The Open Build Service (OBS) is a service that supports community-maintained packages. The openSUSE wiki has instructions on how to add some popular repos from the build service, such as the latest Wine (based on Wine-HQ), games, and more.
A common recommendation is to avoid home repos in the OBS, as these repos can cause issues unless you know or trust the maintainer. Prefer the Tuatara repository for asusctl and related ASUS packages.
The OBS Package Installer (opi) is a helpful tool that allows users to search the OBS and other vendors (e.g., Packman) for specific packages. It can be used to identify what packages are available on the OBS or elsewhere, along with getting links to review them. Opi prompts the user based on matching package names and build locations it finds (there are usually multiple). The chosen repo will be automatically added by opi when installing packages.
Packman
Packman is one of the most commonly used third party repositories for openSUSE. It contains a large set of additional packages like codecs, Discord, OBS Studio, and Steam. Follow the guide on the openSUSE wiki to add the Packman repo. Be sure to follow the zypper dup step to ensure that any existing packages (from the official repos) are updated to pull from Packman. This will help prevent dependency issues. Each future zypper dup will then pull updates for the packages from Packman instead.
The opi tool can be used to install multimedia codecs directly from Packman. This is an alternative to running the zypper commands manually. Adding the Packman repo prior to opi codecs may result in the Packman repo being added twice. This occurs if the alias used is not what opi expects (e.g., “packman” versus “Packman”). If this happens, one repo can be deleted through the method to remove the installation ISO repository (earlier in this guide).
Flatpaks
Flatpaks also solve some of the issues with the lack of software available in the openSUSE repositories. They also provide the benefits of containerized applications. Flatpak may be automatically installed with the default installation settings, but the Flathub repo may need to be added. More information is available on the openSUSE user documentation project.
Asusctl On NixOS
A simple guide for getting asusctl running on NixOS
Contents
Disclaimer
This guide expects some previous knowledge about NixOS and its configuration system.
Please note that NixOS is not officially supported by this project, and any issues specific to it shall be reported on the nixpkgs GitHub page.
Requirement
Linux 6.19 or newer is recommended. To install the latest Linux, put this in your configuration file:
boot.kernelPackages = pkgs.linuxPackages_latest;
Installation
ROG Control Center is included in the asusctl module, so you only have to add to the configuration file:
services.asusd.enable = true;
Then rebuild your NixOS
Important
Power profiles:
asusdmanages platform profiles and CPU EPP settings itself via the ACPIplatform_profileinterface. Running an external power profiles daemon (such aspower-profiles-daemonortuned) alongsideasusdcan cause race conditions over/sys/firmware/acpi/platform_profileand CPU EPP preferences. You have two options:
- Let
asusdmanage profiles and do not enable an external daemon (e.g. do not enableservices.power-profiles-daemon).- Keep the external daemon and disable
asusd’s profile management by setting the following tofalsein/etc/asusd/asusd.ron:change_platform_profile_on_ac: false, change_platform_profile_on_battery: false, platform_profile_linked_epp: false,A common way to switch profiles is binding the
Fn+F5key toasusctl profile nextAvailable profiles vary by system, seeasusctl profile list.
Graphics Switching
See GPU Switching for how to manage the dGPU and MUX.
Cardwire is also packaged in nixpkgs. Enable it with:
services.cardwired.enable = true;
Note
The
services.cardwired.enablemodule is currently only available on nixpkgs unstable. It will be included in the 26.11 release.
For installation and usage instructions, refer to the documentation.
Ubuntu
Only Ubuntu 26.04 LTS is supported; asusctl is distributed using Homebrew
Installation
- Install Homebrew for Linux if you don’t have it already:
/bin/bash -c "$(curl -fsSL https://raw.githubusercontent.com/Homebrew/install/HEAD/install.sh)"
- Add the ublue-os tap:
brew tap ublue-os/homebrew-tap
- Install asusctl and the ROG Control Center:
brew install asusctl-linux
brew install rog-control-center-linux
The casks install the asusd systemd units, udev rules, and D-Bus configuration automatically. Verify the daemon is running:
sudo systemctl enable --now asusd.service asus-shutdown.service
systemctl --user daemon-reload
systemctl --user enable --now asusd-user.service
sudo udevadm control --reload
sudo udevadm trigger
systemctl status asusd.service
For everything else (platform profiles, fan curves, GPU switching), refer to the Usage section.
Power profiles
Important
Power profiles:
asusdmanages platform profiles and CPU EPP settings itself via the ACPIplatform_profileinterface. Running an external power profiles daemon (such aspower-profiles-daemonortuned) alongsideasusdcan cause race conditions over/sys/firmware/acpi/platform_profileand CPU EPP preferences. Ubuntu shipspower-profiles-daemonby default, so you have two options:
- Let
asusdmanage profiles and disable the external daemon:sudo systemctl disable --now power-profiles-daemon.service
- Keep the external daemon and disable
asusd’s profile management by setting the following tofalsein/etc/asusd/asusd.ron:change_platform_profile_on_ac: false, change_platform_profile_on_battery: false, platform_profile_linked_epp: false,A common way to switch profiles is binding the
Fn+F5key toasusctl profile nextAvailable profiles vary by system, seeasusctl profile list.
Graphics Switching
See GPU Switching for how to manage the dGPU and MUX.
PikaOS
Debian Sid-based gaming distribution with asusctl included
PikaOS is a Debian Sid-based gaming-oriented distribution that ships asusctl in its own repositories.
Installation
asusctl is packaged by PikaOS and can be installed directly with apt:
sudo apt install asusctl rog-control-center
After installation
Enable and start the services:
sudo systemctl enable --now asusd.service asus-shutdown.service
systemctl --user daemon-reload
systemctl --user enable --now asusd-user.service
sudo udevadm control --reload
sudo udevadm trigger
systemctl status asusd.service
For everything else (platform profiles, fan curves, GPU switching), refer to the Usage section.
Power profiles
Important
Power profiles:
asusdmanages platform profiles and CPU EPP settings itself via the ACPIplatform_profileinterface. Running an external power profiles daemon (such aspower-profiles-daemonortuned) alongsideasusdcan cause race conditions over/sys/firmware/acpi/platform_profileand CPU EPP preferences. You have two options:
- Let
asusdmanage profiles and disable the external daemon:sudo systemctl disable --now power-profiles-daemon.service
- Keep the external daemon and disable
asusd’s profile management by setting the following tofalsein/etc/asusd/asusd.ron:change_platform_profile_on_ac: false, change_platform_profile_on_battery: false, platform_profile_linked_epp: false,A common way to switch profiles is binding the
Fn+F5key toasusctl profile nextavailable profiles vary by system, seeasusctl profile list.
Graphics Switching
See GPU Switching for how to manage the dGPU and MUX.
asusctl
The command-line client for the
asusddaemon
asusctl talks to the asusd system daemon over D-Bus. Run asusctl info to check the daemon is reachable and see basic system information.
All examples assume asusd.service is running. If a command reports an error, check the daemon logs:
sudo journalctl -b -u asusd
Contents
info
Show the program version and system information, and list what your laptop supports.
asusctl info
asusctl info --show-supported
| Option | Description |
|---|---|
--show-supported | List the supported core functions, platform properties, keyboard brightness levels, aura modes, aura zones, and aura power zones |
profile
Platform profile management. The platform profile controls the power/thermal behaviour of the laptop and is mapped to the kernel’s platform_profile interface.
asusctl profile list            # list available profiles
asusctl profile get             # active profile, plus AC and battery profiles
asusctl profile set Performance # set the current profile
asusctl profile next            # cycle to the next profile
Available profiles:
Note
Available profiles vary by laptop and kernel support. The table below lists those that may be present. Run
asusctl profile listto see the profiles your system actually exposes.
| Profile | Description |
|---|---|
Balanced | Default profile |
Performance | Maximum performance, higher fan speed |
Quiet | Lower fan speed, reduced performance |
LowPower | Lowest power draw |
Custom | Uses the custom fan curve of the same name |
Profile names are case-insensitive. The AC and battery profiles can be set independently with -a and -b, which makes asusd switch profiles automatically when the power source changes:
asusctl profile set Quiet -b        # profile to use on battery
asusctl profile set Performance -a  # profile to use on AC
| Subcommand | Description |
|---|---|
list | List the available profiles |
get | Show the active profile, the AC profile, and the battery profile |
set <profile> | Set the profile |
next | Switch to the next profile in the list |
tuning [true|false] | Enable or disable profile tuning; omit the argument to show the current state |
| Option | Description |
|---|---|
-a, --ac | With set: also set the profile to use while on AC power |
-b, --battery | With set: also set the profile to use while on battery power |
Profile tuning enables and disables the PPT (TDP) tuning group, which controls whether power limits set through the armoury interface are applied. When tuning is disabled, the updated PPT configuration is stored but only applied once tuning is enabled again:
asusctl profile tuning      # show current state
asusctl profile tuning true
asusctl profile tuning false
battery
Battery charge control.
asusctl battery info         # show the current charge limit
asusctl battery limit 80     # stop charging at 80%
asusctl battery oneshot      # one-shot full charge to 100%
asusctl battery oneshot 90   # one-shot charge to 90%
| Subcommand | Description |
|---|---|
info | Show the current battery charge limit |
limit <20-100> | Set the charge limit percentage |
oneshot [percent] | Perform a one-shot full charge; an optional target percent overrides the default of 100 |
fan-curve
Custom fan curves are only supported on specific models. The data format is a comma-separated list of exactly 8 points in the form 30c:1%,49c:2%,..., where each point is a temperature in degrees Celsius followed by a fan speed. If the % is omitted the fan speed range is 0-255. Temperatures and fan speeds must be non-decreasing along the curve, and temperatures above 100 °C are not recommended.
asusctl fan-curve --mod-profile Balanced --data 30c:1%,49c:2%,59c:3%,69c:4%,79c:31%,89c:49%,99c:56%,100c:58%
asusctl fan-curve --mod-profile Balanced --fan cpu --data 30c:1%,49c:2%,59c:3%,69c:4%,79c:31%,89c:49%,99c:56%,100c:58%
There are three fan profiles (Quiet, Balanced, and Performance), each linked to the platform profile of the same name. Enable or disable them:
asusctl fan-curve --mod-profile Balanced --enable-fan-curves true
asusctl fan-curve --mod-profile Balanced --enable-fan-curve true --fan cpu
asusctl fan-curve --mod-profile Balanced --default
asusctl fan-curve --get-enabled
If no profile is activated manually, the fan curve from the BIOS is used.
| Option | Description |
|---|---|
--mod-profile <profile> | The profile to modify. When given without any other option, prints the current curve data for that profile |
--data <points> | Set the fan curve data; requires --mod-profile |
--fan <cpu|gpu|mid> | Select the fan to modify; defaults to cpu. Required by --enable-fan-curve |
--enable-fan-curves <true|false> | Enable or disable all fan curves of a profile; requires --mod-profile |
--enable-fan-curve <true|false> | Enable or disable a single fan curve; requires --mod-profile and --fan |
--default | Set the active profile’s fan curves back to the defaults |
--get-enabled | Print the fan curve data of the active profile |
leds
Keyboard backlight brightness control.
asusctl leds set high    # brightness levels: off, low, med, high
asusctl leds get         # show the current brightness
asusctl leds next        # cycle to the next brightness level
asusctl leds prev        # cycle to the previous brightness level
| Subcommand | Description |
|---|---|
set <off|low|med|high> | Set the keyboard brightness level |
get | Show the current keyboard brightness |
next | Toggle to the next brightness level |
prev | Toggle to the previous brightness level |
aura
Aura lighting control for the keyboard, logo, lightbar, and other zones.
aura effect
Cycle through the built-in factory modes:
asusctl aura effect --next-mode
asusctl aura effect --prev-mode
Or set a specific effect directly:
asusctl aura effect static -c ff00ff
asusctl aura effect breathe --colour ff0000 --colour2 0000ff --speed low
asusctl aura effect rainbow-cycle --speed med --zone one
asusctl aura effect rainbow-wave --direction left --speed med
asusctl aura effect stars --colour ff00ff --colour2 00ff00 --speed low
asusctl aura effect rain --speed med
asusctl aura effect highlight -c ff00ff --speed low
asusctl aura effect laser -c ff00ff --speed low
asusctl aura effect ripple -c ff00ff --speed low
asusctl aura effect pulse -c ff00ff
asusctl aura effect comet -c ff00ff
asusctl aura effect flash -c ff00ff
| Effect | Options |
|---|---|
static | -c/--colour |
breathe | --colour, --colour2, --speed |
rainbow-cycle | --speed |
rainbow-wave | --direction, --speed |
stars | --colour, --colour2, --speed |
rain | --speed |
highlight | -c/--colour, --speed |
laser | -c/--colour, --speed |
ripple | -c/--colour, --speed |
pulse | -c/--colour |
comet | -c/--colour |
flash | -c/--colour |
Every effect accepts --zone, which defaults to none (all zones).
| Option | Description |
|---|---|
-c, --colour <hex> | RGB value, e.g. ff00ff |
--colour2 <hex> | Second RGB value, e.g. ff00ff |
--speed <low|med|high> | Effect speed |
--direction <up|down|left|right> | Effect direction |
--zone <zone> | Zone for the effect; see the zone table below |
Zones can be given as a number or a name:
| Value | Name |
|---|---|
0 | none (all zones, default) |
1 | one |
2 | two |
3 | three |
4 | four |
5 | logo |
6 | lightbar-left |
7 | lightbar-right |
aura power
Enable or disable individual Aura zones per power state on newer (2021+) keyboards. The --boot, --awake, --sleep, and --shutdown switches enable the zone for that state; omitting a switch sets it to false:
asusctl aura power keyboard --awake
asusctl aura power lightbar --boot --awake
asusctl aura power lid --awake --sleep
asusctl aura power ally --shutdown
| Zone | Description |
|---|---|
keyboard | Keyboard zone |
logo | Logo zone |
lightbar | Lightbar zone |
lid | Lid zone |
rear-glow | Rear glow zone |
ally | ROG Ally zone |
| Option | Description |
|---|---|
--boot | Enable power while the device is booting |
--awake | Enable power while the device is awake |
--sleep | Enable power while the device is sleeping |
--shutdown | Enable power while the device is shutting down or hibernating |
aura power-tuf
For older ROG and TUF laptops (product ID 0x1866):
asusctl aura power-tuf --awake true --boot false
asusctl aura power-tuf --awake false --keyboard
asusctl aura power-tuf --boot true --lightbar
asusctl aura power-tuf --awake true --shutdown false
| Option | Description |
|---|---|
--awake <true|false> | Whether the LEDs are enabled while awake |
--boot <true|false> | Whether the boot animation is enabled |
--sleep <true|false> | Whether the suspend animation is enabled |
--shutdown <true|false> | Whether the LEDs are enabled while shutting down |
--keyboard | Apply the state to the keyboard zone (pre-2021 ROG only) |
--lightbar | Apply the state to the lightbar zone (pre-2021 ROG only) |
TUF keyboards have a single keyboard zone: the power options, including
--shutdown, apply to it directly and no zone switch is required.
anime
AniMe Matrix display control. The display can be configured with options on the anime command:
asusctl anime --enable-display true
asusctl anime --enable-display false
asusctl anime --brightness low        # brightness: off, low, med, high
asusctl anime --clear                 # clear the display
asusctl anime --enable-powersave-anim true
asusctl anime --off-when-unplugged true
asusctl anime --off-when-suspended true
asusctl anime --off-when-lid-closed true
| Option | Description |
|---|---|
--enable-display <true|false> | Enable or disable the display |
--enable-powersave-anim <true|false> | Enable or disable the built-in run/powersave animation |
--brightness <off|low|med|high> | Set the global base brightness |
--clear | Clear the display |
--off-when-unplugged <true|false> | Turn the display off when external power is unplugged |
--off-when-suspended <true|false> | Turn the display off when the laptop suspends |
--off-when-lid-closed <true|false> | Turn the display off when the lid is closed |
--override-type <GA401|GA402|GU604|G635L|G835L> | Override the display type if it is not detected automatically |
Display an image or animation:
asusctl anime image --path ./image.png
asusctl anime pixel-image --path ./image.png
asusctl anime gif --path ./animation.gif --loops 3
asusctl anime pixel-gif --path ./animation.gif --loops 0
| Subcommand | Options |
|---|---|
image | --path (required), --scale (default 1.0), --x-pos (default 0.0), --y-pos (default 0.0), --angle (default 0.0, radians), --bright (default 1.0) |
pixel-image | --path (required), --bright (default 1.0) |
gif | --path (required), --scale, --x-pos, --y-pos, --angle, --bright, --loops (default 0) |
pixel-gif | --path (required), --bright, --loops (default 0) |
--bright expects a value between 0.0 and 1.0. --loops 0 plays the GIF infinitely.
Change the built-in boot/awake/sleep/shutdown animations with set-builtins:
asusctl anime set-builtins --awake BinaryBannerScroll --set true
asusctl anime set-builtins --shutdown SeeYa --set true
| Option | Description |
|---|---|
--boot <animation> | Animation shown while booting |
--awake <animation> | Animation shown while awake |
--sleep <animation> | Animation shown while sleeping |
--shutdown <animation> | Animation shown while shutting down |
--set <true|false> | Apply the animations (required) |
Available built-in animations:
| Power state | Animations |
|---|---|
--boot | GlitchConstruction, StaticEmergence |
--awake | BinaryBannerScroll, RogLogoGlitch |
--sleep | BannerSwipe, Starfield |
--shutdown | GlitchOut, SeeYa |
slash
Slash LED bar control (found on some Zenbook models).
asusctl slash get      # show the current state
asusctl slash list     # list the available animations
Configure the slash light bar:
asusctl slash set --enable
asusctl slash set --disable
asusctl slash set --brightness 200
asusctl slash set --interval 3
asusctl slash set --mode Flow
asusctl slash set --show-on-boot true
asusctl slash set --show-on-shutdown true
asusctl slash set --show-on-sleep false
asusctl slash set --show-on-battery true
asusctl slash set --show-battery-warning true
| Subcommand | Description |
|---|---|
get | Show the current state of the slash LED bar |
set | Set slash LED bar options |
list | List the available animations |
| Option | Description |
|---|---|
--enable | Enable the slash LED bar |
--disable | Disable the slash LED bar |
-l, --brightness <0-255> | Set the brightness value |
--interval <0-5> | Set the interval value |
--mode <mode> | Set the animation mode; use slash list for the options |
-B, --show-on-boot <true|false> | Show the animation on boot |
-S, --show-on-shutdown <true|false> | Show the animation on shutdown |
-s, --show-on-sleep <true|false> | Show the animation on sleep |
-b, --show-on-battery <true|false> | Show the animation on battery power |
-w, --show-battery-warning <true|false> | Show the low-battery warning animation |
Available animations: Static, Bounce, Slash, Loading, BitStream, Transmission, Flow (default), Flux, Phantom, Spectrum, Hazard, Interfacing, Ramp, GameOver, Start, Buzzer.
scsi
SCSI drive LED control (some laptops expose these LEDs):
asusctl scsi --enable true
asusctl scsi --list
asusctl scsi --mode RainbowCycle --speed med --direction forward
asusctl scsi --mode Static --colours ff0000 --colours 00ff00
| Option | Description |
|---|---|
--enable <true|false> | Enable or disable the SCSI drive LEDs |
--mode <mode> | Set the LED mode; use --list for the options |
--speed <slowest|slow|med|fast|fastest> | Set the animation speed |
--direction <forward|reverse> | Set the animation direction |
--colours <hex> | Set the LED colours; repeat the option for up to 4 colours |
--list | List the available animations |
Available modes: Off, Static, Breathe, Flashing, RainbowCycle, RainbowWave, RainbowCycleBreathe, ChaseFade, RainbowCycleChaseFade, Chase, RainbowCycleChase, RainbowCycleWave, RainbowPulseChase, RandomFlicker, DoubleFade.
armoury
Read and write firmware attributes exposed by the asus-armoury kernel driver. Run asusctl armoury list to see the attributes supported by your laptop.
asusctl armoury list               # list supported firmware attributes
asusctl armoury get dgpu_disable   # read an attribute
asusctl armoury set dgpu_disable 1 # set an attribute
asusctl armoury set dgpu_disable -1 # reset an attribute to its default
| Subcommand | Description |
|---|---|
list | List all firmware attributes supported by asus-armoury |
get <property> | Get the value of a firmware attribute |
set <property> <value> | Set a firmware attribute; a value of -1 resets it to the default |
Attributes of type PPT (power limits) are only applied to the hardware while profile tuning is enabled; otherwise the new value is stored and applied the next time tuning is turned on.
See GPU Switching for the full dGPU/MUX story.
backlight
ScreenPad backlight control (Zenbook models with a ScreenPad):
asusctl backlight --screenpad-brightness 80
asusctl backlight --screenpad-gamma 1.2
asusctl backlight --sync-screenpad-brightness true
With no options, the current screenpad settings are printed.
| Option | Description |
|---|---|
--screenpad-brightness <0-100> | Set the screen brightness |
--screenpad-gamma <0.5-2.2> | Set the screenpad gamma brightness; 1.0 is linear |
--sync-screenpad-brightness <true|false> | Sync the screenpad brightness with the primary display |
xgmled
XG Mobile LED control:
asusctl xgmled get      # show the current LED state
asusctl xgmled set 1    # 1 = on, 0 = off
| Subcommand | Description |
|---|---|
get | Show the current XG Mobile LED state |
set <0|1> | Set the XG Mobile LED on (1) or off (0) |
Something not working?
See the FAQ for common issues. In most cases the answer is in the asusd logs:
sudo journalctl -b -u asusd
General
Contents
- How do I get desktop notifications for asusctl?
- How can I enable S3 (legacy) suspend?
- Note for ROG Zephyrus G15 (2022)
- What steps are needed if I want to dual boot?
- Note for ROG Flow X13 (2021)
- Is
<distro>supported by asusctl?
How do I get desktop notifications for asusctl?
This function is now integrated into the ROG Control Center, so long as you run it in the background you will get the notifications.
You can find all notify settings in the “App Settings” in the ROG Control Center.
How can I enable S3 (legacy) suspend?
Depending on your kernel version, you may occasionally experience issues with the 2021/2022 versions of the Zephyrus G14/G15 which affect the proper use of newer suspend methods, like s0ix.
A potential fix is to patch your DSDT tables so your machine uses the older suspend method, called S3. In our tests this works great on the 2021 / 2022 G14 and G15. Those patches are not part of the main repo and can’t be. It will always be a manual matter and cannot be integrated into the kernel.
Important
If you update the BIOS be sure you disable your DSDT table and create a new one. DSDT tables could change with newer BIOS versions!
You can find the script here: https://gitlab.com/marcaux/g14-2021-s3-dsdt
Note for ROG Zephyrus G15 (2022)
After BIOS version 313, ASUS fixed ACPI support for Linux, which is crucial if you want Performance mode to work properly.
And ASUS optimized power distribution between CPU and GPU, which before caused stuttering/frame drops in performance mode that confuse many users for a long time.
What steps are needed if I want to dual boot?
Be sure to consider the following:
- disable fast boot within the BIOS
- disable fast boot in Windows
- always fully shutdown after using and switchting to another OS so the hardware gets correctly initialized
If you still experience an issue, hold down the power button while on battery for a few seconds to force a shutdown. This often helps to reset some things.
These steps are not needed if you are running Linux exclusively.
Note for ROG Flow X13 (2021)
BIOS versions 408 & 409 cannot boot a Linux kernel newer than 5.15.x so you will need to upgrade to the 410 BIOS from the official ROG Flow X13 (2021) BIOS support page.
Is <distro> supported by asusctl?
See the Supported Distributions page for the officially supported distributions and what to expect on others. In short: The kernel must be >=6.19.
Graphics & Switching
Contents
Nvidia card is not sleeping!
After checking the usual suspects:
- Missing configuration: follow the setup steps in the distribution guides.
- GPU monitoring widgets: keep the GPU on to monitor it!
- ollama: if ollama is running nvidia might not be able to sleep!
One possible culprit might also be realtime audio kit being enabled.
This service can probe all available audio devices, which includes nvidia hdmi audio!
Nvidia Dynamic Boost isn’t working!
Since version 525.53, NVIDIA added official Dynamic Boost support for AMD laptop that uses Ryzen 6000 Series (or newer) CPU.
To enable it, follow the next steps:
- Start nvidia-powerd.service
sudo systemctl start nvidia-powerd.service
If you don’t want to start it manually each time, then:
sudo systemctl enable nvidia-powerd.service
- Set your power profile to “Performance” Mode
You can do it in many ways. If you already installed asusctl, you can switch to it using:
asusctl profile set Performance
or ROG Control Center (GUI) to set it.
- Test it
Using tools like “nvtop” and “mangohud”, you can monitor your CPU and GPU power in realtime.
To check if the Dynamic boost works, you need to identify what is the MAX TGP your model support. Usually, it can be found on manufacturers’ websites.
Here are some power data collected from Zephyrus G15 (2022), which rated 120-watt maximum TGP.
Quiet mode: 25 Watt (CPU) + 60 Watt (GPU)
Balanced Mode: 30 Watt (CPU) + 80 Watt (GPU)
Performance Mode: 25 Watt (CPU) + 115 Watt (GPU)
GPU Switching
Managing the dGPU and MUX on hybrid ASUS laptops
What GPU modes does my laptop support?
Support varies between laptops: some have Eco Mode only (dgpu_disable) and some have Ultimate Mode as well (gpu_mux_mode).
You can set your GPU configuration by modifying the setting under the GPU Configuration tab in the ROG Control Center. It writes both the dgpu_disable and gpu_mux_mode attributes. Alternatively, use the command line:
You can check if your device supports graphics switching by running:
asusctl armoury list
If your device supports disabling of the dGPU (Eco Mode), you should see an entry that looks like the following:
dgpu_disable:
  current: [(0),1]
When this attribute is 1, the dGPU is disabled and only the iGPU will be used (Integrated mode). A value of 0 leaves the dGPU enabled. dgpu_disable is independent of the MUX, so whether the dGPU drives the display is then up to gpu_mux_mode.
If your device supports routing the screen to the dGPU (Ultimate Mode), you should see an entry that looks like the following:
gpu_mux_mode:
  current: [(0),1]
Here, a current value of 0 means that the MUX is disabled, in which case the discrete GPU is your default GPU and will be routed to your screen.
asusctl armoury set dgpu_disable 1   # disable the dGPU
asusctl armoury set dgpu_disable 0   # re-enable the dGPU
asusctl armoury set gpu_mux_mode 0   # enable the MUX (route the screen to the dGPU)
asusctl armoury set gpu_mux_mode 1   # disable the MUX
On MUX-capable systems the two attributes must be set in pairs; the valid combinations are:
| Mode | dgpu_disable | gpu_mux_mode |
|---|---|---|
| Integrated | 1 | 1 |
| Hybrid | 0 | 1 |
| Ultimate | 0 | 0 |
On systems without a MUX, only dgpu_disable is available.
Note
Due to how Linux systems are configured to use the dGPU, you must reboot your system after changing your dGPU configuration. If you wish to power off your dGPU without rebooting, you should use an alternative program such as Cardwire (see below).
Cardwire
Cardwire is the community’s new replacement for the now-deprecated supergfxctl. It manages the GPU with an eBPF/LSM approach, allowing the dGPU to power down at runtime - no reboot required.
Caution
Cardwire is currently still considered EXPERIMENTAL. If you choose to install this tool, expect rough edges and quirks. For support, join our Discord server.
See the Cardwire documentation for installation and usage instructions. On some distributions it is packaged: on Arch via the OGC repository (pacman -S cardwire), on Fedora-based systems via Terra (dnf install cardwire), and on NixOS via services.cardwired.enable.
Keyboard
Contents
- Can I re-map the arrow keys?
- I have a laptop where the arrow keys do not emit keycodes, can I use these?
- My keyboard isn’t working properly with the driver
- Can I customise the Fn key?
- My laptop has no SysRq key. Can I remap any key to SysRq?
Can I re-map the arrow keys?
Yes, create a file named /etc/udev/hwdb.d/90-nkey.hwdb with:
# Format evdev:input:b<bus_id>v<vendor_id>p<product_id>

# ** Note **
# The line evdev:input:b0003v0B05p1866* may vary on your ASUS Laptop.
# Modify the <vendor_id> and <product_id> based on the output of this command to ensure remaps work:
# $ lsusb | grep 'ASUSTek Computer, Inc. N-KEY Device' | awk -F'[: ]' '{print $7" "$8}' | tr '[:lower:]' '[:upper:]'

evdev:input:b0003v0B05p1866*
  KEYBOARD_KEY_c00b6=kbdillumdown # Fn+F2 (music prev)
  KEYBOARD_KEY_c00b5=kbdillumup   # Fn+F4 (music skip)
  KEYBOARD_KEY_ff3100c5=pagedown  # Fn+Down
  KEYBOARD_KEY_ff3100c4=pageup    # Fn+Up
  KEYBOARD_KEY_ff3100b2=home      # Fn+Left
  KEYBOARD_KEY_ff3100b3=end       # Fn+Right
then update hwdb with:
sudo systemd-hwdb update
sudo udevadm trigger
You can see a list of keycodes here.
I have a laptop where the arrow keys do not emit keycodes, can I use these?
Yes, you can.
My keyboard isn’t working properly with the driver
You may have a different keyboard. Please request support in one of the related projects on github, or in the discord server.
Can I customise the Fn key?
No, the key is on a physically different circuit and used to physically signal the keyboard EC to switch key circuits.
There are three different circuits for the 0x8166 keyboard.
My laptop has no SysRq key. Can I remap any key to SysRq?
Yes! Similar to remapping the Arrow-Keys above, you can remap - say the menu (fn+RightCtrl) key to SysRq.
Just add another line to /etc/udev/hwdb.d/90-nkey.hwdb with the following, including the leading whitespaces:
KEYBOARD_KEY_<ScanCode>=sysrq # force remap sysrq to Fn+RightCtrl
You can get the <ScanCode> by running
evtest /dev/input/by-id/usb-ASUSTeK_Computer_Inc._N-KEY_Device-*-kbd
and pressing the RightCtrl key.
In this case, it is 70065
Testing ... (interrupt to exit)
Event: time 1662839073.640933, type 4 (EV_MSC), code 4 (MSC_SCAN), value 70065 <--------- Substitute this as <ScanCode>
Event: time 1662839073.640933, type 1 (EV_KEY), code 127 (KEY_COMPOSE), value 1
Event: time 1662839073.640933, -------------- SYN_REPORT ------------
Then update hwdb with:
sudo systemd-hwdb update
sudo udevadm trigger